Setting Up Your Own Home Gym
Episode #3 of the course Hack your workout: A self-paced system for core muscle and posture strength by John Robin
Welcome to Day 3 of our course!
Now that you have the microcycle sheet, all you need is the place and equipment to do the workout. While you can do this all at the gym, I’m going to show you how to do it at home if you want to harness the freedom of working by the set, rather than the session.
Let’s dig in!
Your Simple Shopping Checklist
Setting up a home gym will cost about $1,500. While that might sound expensive, calculate membership fees and what you’d spend on gas getting to and from your gym.
I did this calculation, using a $30/month fee, three weekly sessions, and 15-minute drive each way at $1 of gas/15-minute drive. I found that I would pay close to $1,500 after two years—and the time I spent behind the wheel in that period added up to the equivalent of about one month of full-time work. The choice for me was a no-brainer.
Here is the equipment you’ll need.
Main components:
• powerlifting bar
• power rack with adjustable horizontal pins
• a bench for doing bench presses
• weighted plates in pairs of 45 lb., 35 lb., 25 lb., 10 lb., 5 lb., and 2.5 lb.
Secondary components:
• adjustable ankle weight holder with Velcro straps and 20 x 1-lb. insertable weights
• one large rubber mat to go under the power rack and lifting area
• two dip bars that attach to the vertical bars on the power rack
I will include links at the end of the lesson to where each of these items are sold online, as a reference, but I recommend that you buy them from a local sports equipment store.
More about the Main Components
Powerlifting bar. You’ll be using the powerlifting bar for squats, deadlifts, bench presses, overhead presses, and barbell rows.
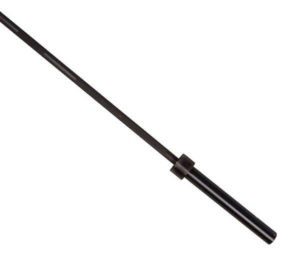
It lets you load weighted plates on each end so you can increase your weight as you improve.
Proper powerlifting bars go for $300-400.
Here are added specs:
• 2.2m (7-ft.) long
• 45 lb. heavy
• withstands up to 1,000 lb.
• knurling (crosshatched) pattern for grip, including center knurling
• 28-29mm thick on the central bar
• 50mm (2-in.) thick on the rotating sleeves at the ends, which lets the plates spin so they don’t strain your wrists, elbows, and shoulders
Also, make sure that you don’t ask for a “weightlifting bar.” Weightlifting bars are used in the Olympics. The simplest way to tell them apart: Weightlifting bars have no center knurling. You need the center knurling to prevent the bar from slipping down your back during squats.
The power rack. The power rack is a structure within which you’ll do your squats, bench presses, and overhead presses.
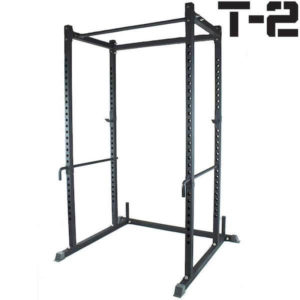
It’s designed to save you from injury and even save your life. It has adjustable safety pins so you can safely fail a rep of squats or bench presses.
A proper power rack will cost you about $700.
Here are additional specs:
• a cage made of four vertical bars joined at the top and bottom by metal frames
• two horizontal safety pins that hold up to 700 lb. (these safety pins must be adjustable)
• two (ideally four) J-hooks that fit on the vertical bars, where you set the barbell to start and finish the squat, bench press, and overhead press
The bench. The bench is a flat, solid, horizontal unit. You place it inside the power rack and lie on it to safely do the bench press.
A proper bench will cost you $299-500, depending on the brand.
Make sure it also has these specs:
• supports up to 600 lb. (your body weight + the weight you’re benching)
• 30cm (1-ft.) wide, to support your back while pressing
• 45cm (17-in.) tall, to engage your legs without your knees coming too high
• firm padding, to transfer power properly (test out its firmness by lying down on it before you buy)
• non-slip padding, to keep your upper back fixed
Some benches come with adjustable incline. You don’t need this. In fact, it’s better to have a bench that’s all one unit, because adjustable incline benches have a gap that your butt often slips into, compromising your form or distracting you when you press.
Plates. The plates are what you’ll load on each end of the powerlifting bar, to add weight.
Additional specs:
• Plates should be round.
• The best plates are made of solid cast iron.
• Rubber coated is fine but more expensive. The coating makes less noise when you lower the bar, but you can compensate for this with a proper mat.
• Don’t get bumper plates made of solid rubber. These are meant for Olympic lifters who drop the bar on the floor.
What Comes Next
You will have everything you need for your workout if you buy the equipment laid out in the above list. A proper gym will also have all this equipment.
Tomorrow, we’ll go more in detail on the strength exercises you’ll be doing with this equipment.
Stay tuned!
Examples of equipment
The powerlifting bar you’ll need (Rogue Ohio Power Bar)
The power rack you’ll need (Titan Power Rack T-2 Series)
Dips bar attachment for Titan T-W Series Power Rack
The bench you’ll need for bench press (Marcy Flat Utility 600 lb. Capacity Weight Bench)
Adjustable ankle weights with up to 20 x 1-lb. insertable weights (CAP Barbell)
Share with friends