
Sink Those Images!
Episode #6 of the course Easy exercises to upgrade your photography by Tom Ang
Hi there!
Did you find yourself surprised by how an image with a deliberately “wrong” exposure can look good?
Photographers have known this since film started to be processed industrially. The idea of a “correct” exposure was for the convenience of the industry, not to serve photographic creativity.
Just a reminder: Correct exposure is something you decide, not the camera nor some workshop leader.
Today, let’s look at low key.
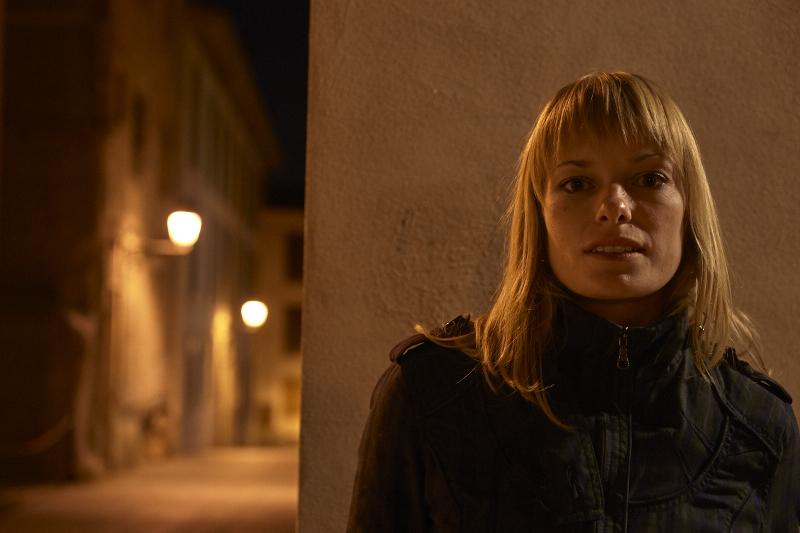
Low Key
This, as you might guess, is where the key middle tones are darker than usual. This makes shadows go darker; if they are already quite dark, they turn completely black. At the same time, highlights will be dimmed. Technically, highlights should be at just above mid-tone or middle grey.
Highlights tend to resist being turned as dark as mid tones. This is a crucial fact. It means that anything that is brightly lit will retain brightness even if you greatly under-expose the image. Welcome to a very powerful tool!
Let’s try it out:
• Same as yesterday’s exercise, but now you sink exposures by setting -2 stops on the override control in any auto-exposure mode.
• Again, photograph in lots of different kinds of lighting, with different subjects.
• And as before: Do not chimp! Review only on computer monitor. This applies particularly for dark images, as these are near-impossible to assess properly on camera backside LCD screens.
• Back on your computer monitor, you are searching for images that will work with the dark look. Attend to the lighting conditions that make it work, and look at how shadows are handled and how you can work with what the images offer you.
• Try to go without post-processing at this stage. Learn how to work with what comes out of the camera, which makes you careful about how you frame, focus, and shoot.
• Check the images on your computer monitor screen for confident assessments. Do you find that the successful images tend to be those from situations with contrasting lighting? And the less successful ones are from flat lighting? But even the right kind of subject—usually with clear outlines—can be successfully captured in low key.
Notice that colors appear richer and deeper: That’s a direct result of reducing exposure.
Take It Further
If you wish to take low key further, try these:
• In image manipulation software, open Levels and drag the left-hand shadow point toward the center of the image. This will block up more shadows to turn them into black.
• In image manipulation software, try using the Brightness (not Exposure) control to darken the mid-tones of the image.
• If you find the highlights are getting too dark, adjust them in Levels: Drag the right-hand highlight point toward the center of the image. This brightens the image without making the shadows brighter.
As you get to appreciate photographs that are different from those you normally make, subtle changes are taking place. You start thinking about the potential look of a subject instead of trying to capture it as you see it. That’s a sign of maturing photographic skill!
Tomorrow, we’ll have a change of pace. We’ll look at ourselves!
See you tomorrow!
Sources of inspiration
One of the great masters of low key photography is Bill Brandt.
Another master, in a totally different vein, is Eikoh Hosoe.
Recommended book
The Art of Photography: A Personal Approach to Artistic Expression by Bruce Barnbaum
Share with friends