Hue and Cry
Episode #10 of the course Easy exercises to upgrade your photography by Tom Ang
Hello!
In this, our final lesson featuring easy exercises to upgrade your photography, we work with color.
In previous lessons, we looked at the notion of “correct exposure” and found that when you think about exposure in a flexible way, you have more freedom in the way you make photos. You will worry less. It also helps loosen up your camera technique.
The same advantages can arise from freeing ourselves from the idea of the “correct” color.
Balanced Color
You know how colors at sunset are richly red and orange. Or maybe you’re familiar with being indoors and looking out to a twilight sky: The sky appears amazingly blue.
These are all examples of the true color of an object being shifted by strong colors present in the illuminating light. But small differences—differences you cannot see—can also have a big effect on the true color of objects in a photograph. Fluorescent office lights, for example, may all look white, but many are tinged with green. This tint or color cast makes flesh tones look unhealthy.
Digital cameras can all compensate for some of these color tints. That’s how colors in your images look correct, almost irrespective of the lighting conditions.
Uncolor
In this exercise, let’s explore “incorrect” color, just as we did with exposure. As you might guess, if you liberate yourself from the concept of the “correct,” you can increase your artistic freedom. And you won’t have to buy any new equipment!
Try to do the following:
• Set your camera to record in JPEG format.
• Set the White Balance control of your camera to Tungsten if you’re planning to photograph out of doors. This will give a strong blue cast to your images.
• Set the White Balance control of your camera to Cloudy or Daylight if you’re planning to photograph indoors. This will give a strong red or orange cast to your images.
• Start by making test shots to learn the effect of the settings. Try photographing multi-colored subjects like advertising posters or flowers, as well as more uniformly colored subjects like building interiors.
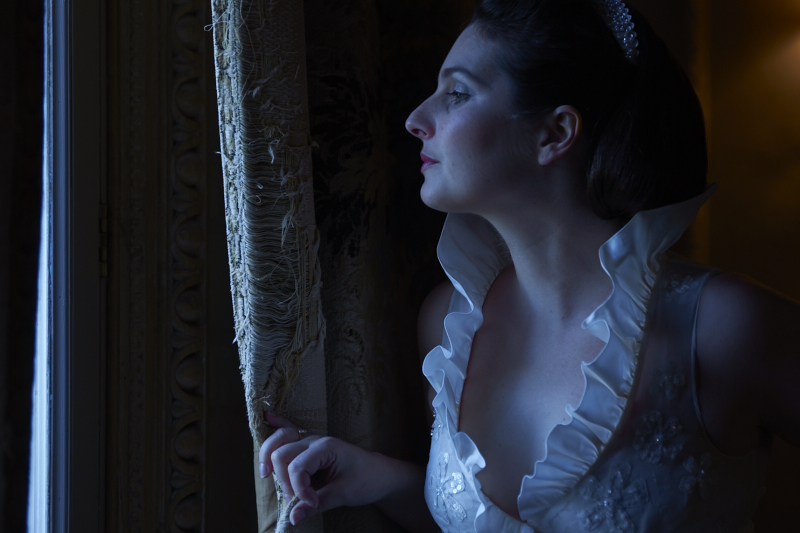
• When you become more familiar with the strongly tinted results of a “wrong” white balance setting, think of the kinds of subject that might benefit from the “wrong” tints and try out your ideas. For example, skin tones can work when tinted by blue. Interiors lit by daylight are stunning when balanced as Tungsten.
• As you get used to working with “wrong” white balance, you can try other settings for varying lighting conditions. For example, set Flash when skies are clear: The scenes come out tinted in orange or tobacco colors.
Some Advanced Techniques
If you get into the swing of this, it’s useful to know that many modern cameras have settings that can make it easier to run these color experiments:
Some cameras offer White Balance bracketing that is just like Exposure Bracketing except it gives you three different white balance settings in a quick burst.
Custom settings are useful because it gives you repeatable results. These work by measuring a specific patch of grey to calculate the white balance. Consult your camera manual for details, as methods vary. You can use this to use a color instead of grey as the reference patch.
In general, non-standard white balance is worth keeping in your toolkit, but you may not use very often. As a personal style, some landscape photographers use white balance settings that deliberately make the landscape look much warmer or redder than in real life. Some portrait photographers use white balance settings that make skin tones pale and cool in tint as a stylistic signature. What is a weird color cast for one person is a creative masterstroke for another. So before you start, I recommend that you search wrong white balance and wrong color balance on your favorite photo-sharing site (for example, on Flickr).
Congratulations on completing this course! I hope you’ve enjoyed learning about these ways to upgrade your photography! Remember to try them out. The results will be much better than you imagined!
Have fun!
Recommended book
Photography: The Definitive Visual History by Dorling Kindersley, Tom Ang
Share with friends