Bracketing Knowledge
Episode #4 of the course Easy exercises to upgrade your photography by Tom Ang
Hello!
Today, the exercise is in two parts: some photography, followed by a careful look at the images on your computer screen. Our purpose is to lead you away from a rigid notion of “correct” or “right” exposure. This can greatly liberate your photography.
Right or Not
The idea that there is one perfect exposure for any scene or subject is deeply ingrained. It may seem obvious, but that’s like claiming there’s one perfect way to say something or one perfect way to sing a song.
There is a technical definition for correct exposure. It goes like this: It places the 18% reflectance of the image mid-tone at the mid-point of a normalized tone-mapping of the subject luminance range.
My definition of correct exposure is that it that gives the results you wish to see.
I think you’ll find my definition much easier to understand. Better, it gets you closer to expressing yourself through an image.
Sitting on the Fence
The best way to learn this is to use bracketing exposures. Set exposure mode to any automatic mode, such as aperture priority or program. Then set exposure bracketing: This makes a series of exposures ranging from under-exposed, through normal, to over-exposed. Different cameras use different ways—on a dial or menu option—so please check your instruction manual if you don’t know how.
Do the following:
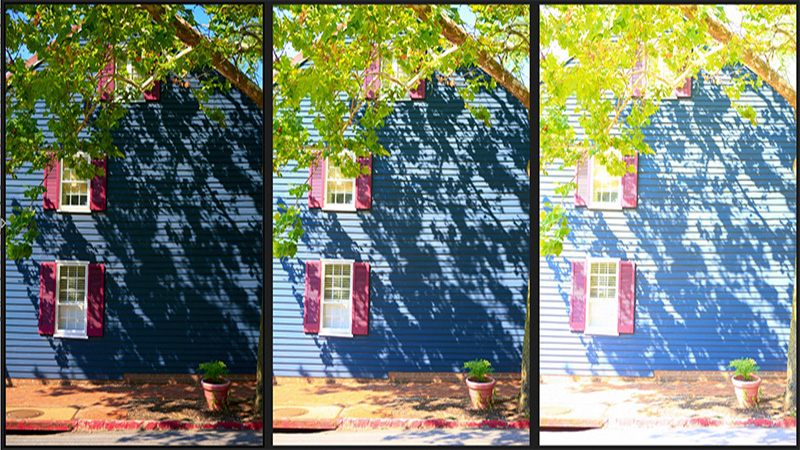
• Set a three-exposure bracketing with intervals of 2 stops so the sequence will be -2 stops, normal, +2 stops. (Some cameras shoot normal exposure first, then the other two.)
• Photograph a range of subjects in different light: flat light, against the sun, silhouettes, side-light, indoors, outdoors, back-light, and so on. Make every shot bracketed. They don’t have to be great images, but try to get the best you can without limiting yourself.
• If you wish to save on file space, set a low resolution in your camera.
Look and Learn
Now you have a bunch of images in sets of three. On your computer monitor (not the camera), check through each set of three images and decide which looks the most interesting. Not correct. Not necessarily the “best.” But the one that seems to have the most artistic potential.
What do you find? I expect you will find that there are interesting shots in some of the underexposed, some of the correctly exposed, and some of the overexposed. What I think you’ll find is how many interesting images are not the correctly exposed ones. That’s the beginning of your learning!
You may find this pattern emerging:
• Where lighting is high-contrast—i.e., there’s a big difference between darks and bright areas—under-exposed images often work well.
• Where lighting is strongly from the side, underexposed images often work well.
• Where lighting is flat and even, correct exposure or overexposure often work well.
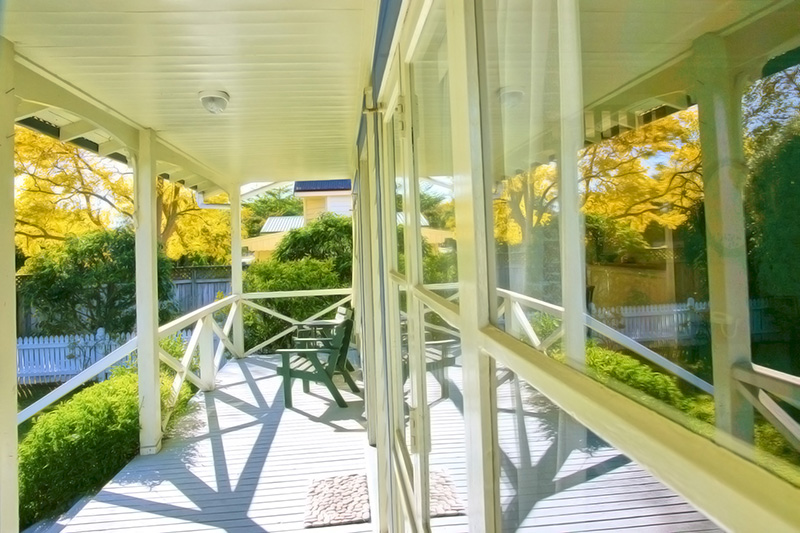
• Where the subject is strongly backlit, over-exposure often works well.
The conclusion: It’s not the camera that decides what the correct exposure is, it’s you. If in doubt, bracket exposures to give yourself a choice.
See you tomorrow when we’ll talk about the high key!
Sources of inspiration
Constantine Manos: American Color 2, an enthralling collection of photographs by a master composer of images and master of exposure.
Alex Webb: Travel photojournalism at its vivid best.
Recommended book
Understanding Exposure: How to Shoot Great Photographs with Any Camera by Bryan Peterson
Share with friends