To the Power Two
Episode #6 of the course Master photographic composition by Tom Ang
Hello!
In the previous lessons, we’ve looked at some ideas that could be slippery to grasp. This can make it tricky to apply them in real life. Don’t worry. Training your eye is like any other training: The more you work at it, the easier it comes. Go over the lessons and look at the sample pictures, then try to apply the ideas in your own photography.
Today, to give you a rest, we’ll consider a really easy idea: symmetry.
It’s one you’re very familiar with because our bodies are built with symmetry. Our left and right halves mirror or reflect each other. Cars, dogs, cats, birds—they all have mirroring left and right sides.
Photographic Symmetry
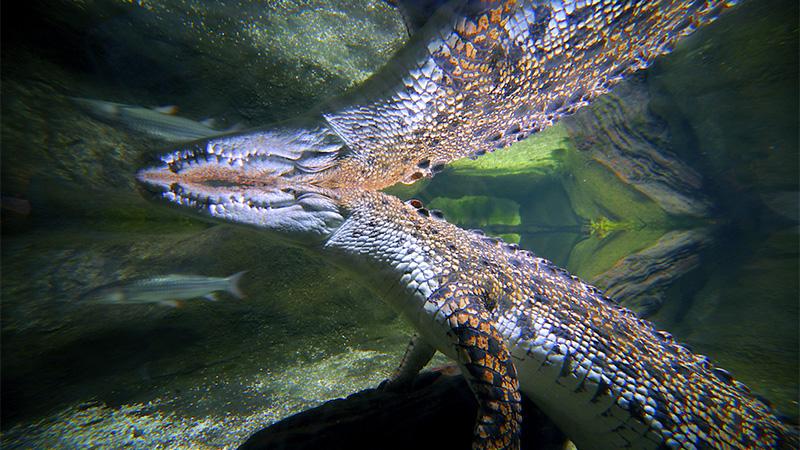
In a way, symmetry in photography is a special kind of pattern: The two sides reinforce and repeat each other, so their visual values are doubled. In that doubling, their power is strengthened.
There are many ways you can explore symmetry in a scene. For example:
• Use reflections—it’s the easiest way to find symmetry. Lakes on windless days are good sources. Ponds and even street puddles can be useful. With water being used more and more in modern interiors, you can find beautiful mirrors in water features. Check out hotels, large shopping malls, and big, modern galleries. For the biggest and best reflection, place your camera as close to the water as you can (or are allowed to).
• Notice that the mirror you use can be vertical too. Typically, this is a sheet of glass. Modern architecture again delivers handsomely. Many buildings have vast panes of glass that reflect street life, other buildings, and the sky. Remember to place your camera as close to the glass as possible for maximum reflection. (But don’t get into trouble with building security! If in doubt, ask first.)
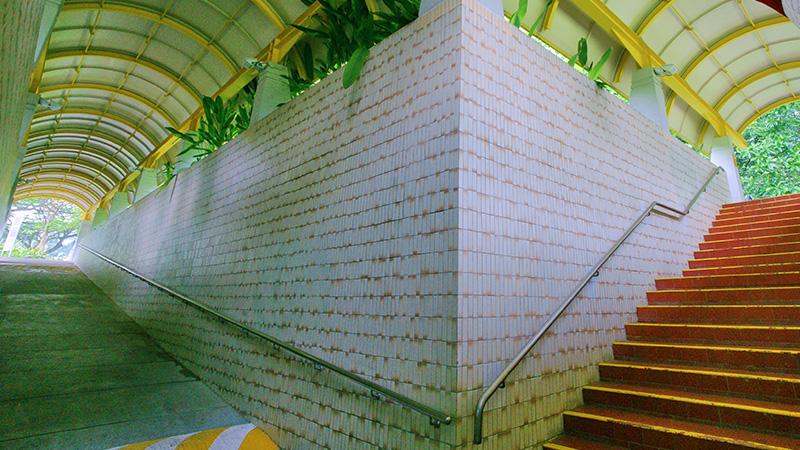
• Look out for the corners of modern buildings, and passageways—that’s another easy place to find symmetry. The corner provides a natural edge that defines the axis of the symmetry. Try using extensive depth of field (lens aperture of, say, f/8) to get the view sharp. In this shot of a pedestrian underpass in Singapore, the corner between two passages gives a mix of symmetry and differences.
• Start your shooting by placing the middle line of the symmetry in the middle of the picture. This gives the most predictable and safest results. But you can experiment with different placements and by tilting the camera to tilt the mid-line.
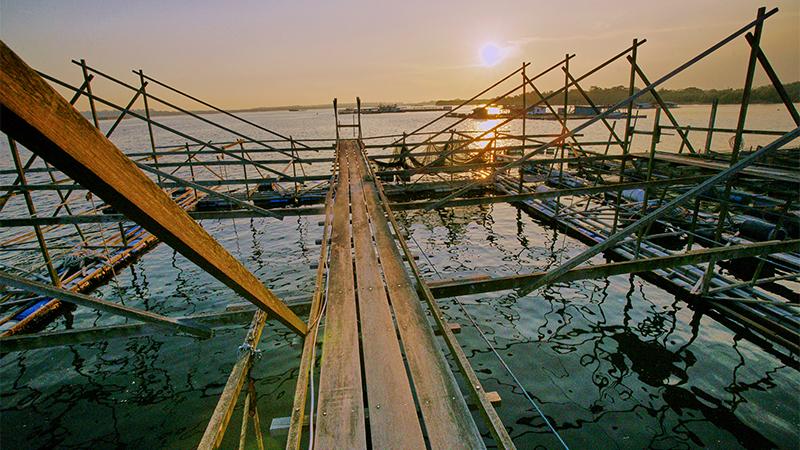
As with other techniques, we work best between the extremes. We avoid two sides that match too well and sides that are so different, there’s no symmetry. In the view of a sunset on a fish farm below, the differences between left and right sides of the picture are almost too great.
A Bonus
When you use this technique, you’ll see that working at the corners of objects makes the field of view—what is seen by the lens—seem to be bigger than normal. It’s as if you’re using a wide-angle lens. So, even with a normal lens, you can get striking results.
Have fun with symmetry. It’s one of my favorites!
Tomorrow, we look at a composition technique that can truly raise your game.
Best!
Tom
Recommended resource
Looking Glass: A gallery of images that exploit the power of reflection and symmetry.
Recommended book
Share with friends