Software
Episode #8 of the course Introduction to photography by Robin Whalley
Yesterday, you learned how accessories can improve your photography. Today, we will look at one of the most important accessories: software.
Types of Software
Photography software can serve two purposes:
1. to organize and manage your photographs
2. to edit and improve your photographs
Depending on the software, it may serve one or both purposes.
To illustrate the difference photo editing software can make, here’s a before and after example.
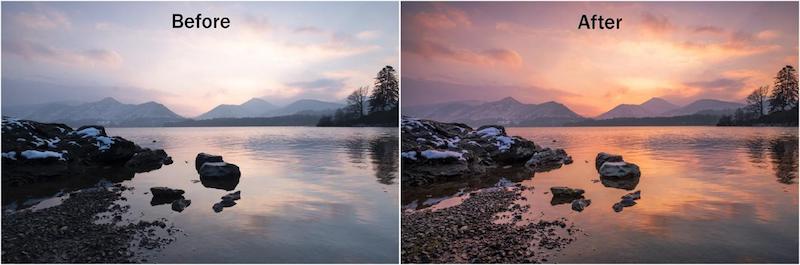
Some call this cheating, but that’s because they don’t understand why software is essential.
Shooting in RAW
Most cameras save the photographs using the JPEG format. But some cameras also save the photographs as a RAW file. RAW files store the data that comes directly from the camera sensor and needs to be processed. The before picture above is how the RAW data looks and the after image is following processing.
When a camera creates a photo as a JPEG, the camera has automatically processed the sensor data. Sometimes the JPEG photos will look good, but often, the camera makes changes you don’t want—for example, removing the color from a sunset scene.
Experienced photographers shoot in RAW format and control the conversion into the finished photograph.
Software for Photographers
Here is popular software that most photographers use.
Adobe. Two of the most popular packages are Adobe Photoshop and Lightroom. These are powerful tools, helping you edit and organize your photography. At one time, you could purchase these, but now you must rent them. If you do decide to rent them, look for the “Photographers Plan,” which costs much less than the full plan.
When you have a lot of photos, it becomes difficult to find the one you want. “Library Management” software, such as Lightroom, can help.
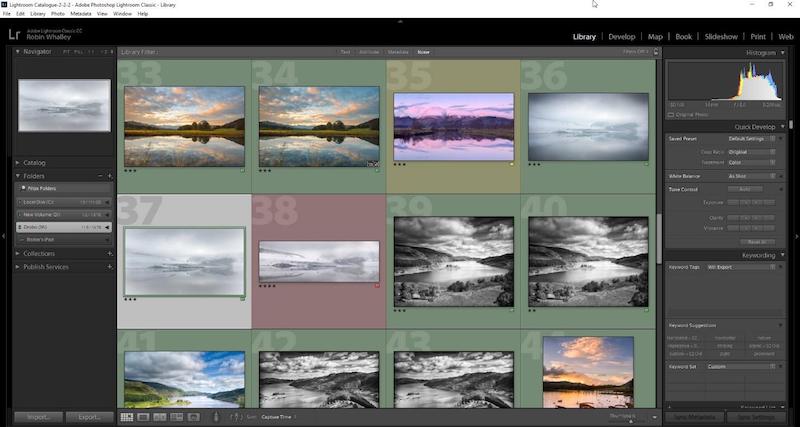
Lightroom allows you to move your photos from your camera to a hard drive. It then keeps track of the photos and allows you to read important information called Exif data in the image, like shutter speed and ISO.
You can also use it to tag your photos—for example, by adding a star rating to indicate the best. You can then use these tags to filter your library, identifying images that meet your criteria.
It can be helpful to add “Keywords” to photos. These are words that describe the photo—for example, “sunset,” “lake,” “mist.” You can then search your library for photos with a certain keyword.
Adobe also produces the Elements software that you can purchase. Elements is often described as a cut-down Photoshop, since the more complicated features have been removed. Elements also includes a basic photo organize package to help you manage your photos.
One significant benefit of Adobe software is that there are many books and courses to help you learn.
Affinity. Affinity Photo has capabilities like Adobe Photoshop and allows serious photo editing. It’s available to purchase rather than rent for the PC or Mac. There’s even a version for the iPad.
ON1 Photo RAW. Plugin software was originally developed to simplify software like Photoshop. In recent years, many plugins have evolved into standalone packages. ON1 Photo RAW is one example, providing powerful image editing and photo management features. It can also be used as a plugin for Photoshop and Lightroom.
Alien Skin. Exposure by Alien Skin is a photo management and editing. It can be used standalone or as a plugin for Photoshop and Lightroom.
GIMP (Free). This is powerful image editor with capabilities like those in Adobe Photoshop.
Darktable (Free). Available for the PC and Mac, Darktable is a photo management and editing tool like Lightroom.
Nik Collection (Free). The Nik Collection from Google is a free set of Photoshop and Lightroom plugins, although its future is a little uncertain. Currently, you can still download the original version for free.
Having spent time taking and improving your photos, it’s time to share them with others. That’s what we will be exploring tomorrow.
Recommended resource
You will find demonstrations of image editing using many of the tools on my YouTube Channel.
Recommended reading
Introduction to Lightroom: Part 1 and Part 2
Share with friends