More Photo Fixes
Episode #6 of the course How to edit photos in Lightroom by Robin Whalley
Today, we will continue with the theme of looking at tools to help you fix common photo problems.
Cropping for Composition
A frame ratio like 1:1 or 3:2 tells us how the height and width of a photo relate to each other—e.g., a 1:1 ratio means the width and height of the photo will be the same. Cameras allow you to switch between the different ratios; this doesn’t mean that there is one that’s ideal for your photo. This is where the Crop Tool can help.
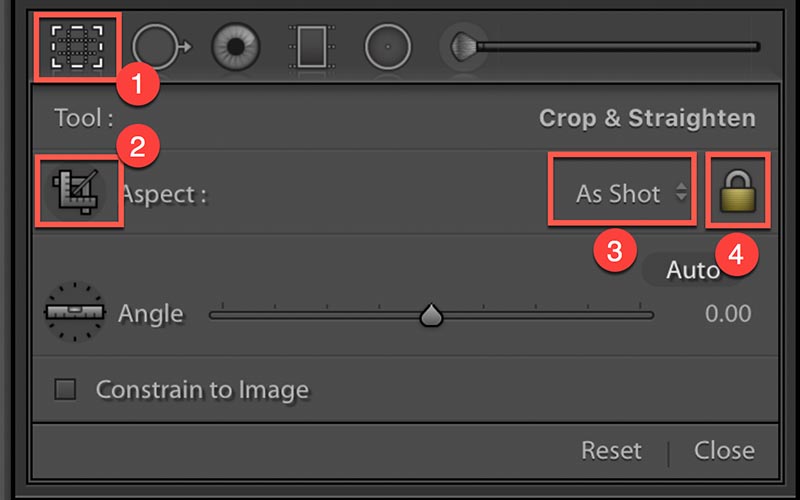
Activate the Crop Tool by clicking the icon (1), found just below the Histogram. When activated, you will see the panel of tools expand and a grid appear over the image. You can click and drag the edges of the grid to resize it. You can also click and drag the photo to reposition it within the grid.
Click icon 2 in the panel to select the Crop Frame tool. When active, you can draw a crop area on the image. This is an alternative to resizing the grid.
If you click the dropdown menu (3), you will see a list of frame ratios—for example, 1:1. When you select a crop ratio, the grid will be resized to match the ratio.
The lock icon (4) locks the crop to the selected ratio (3) when the padlock is closed. Clicking the padlock to open it allows you to resize the cropping area without constraint.
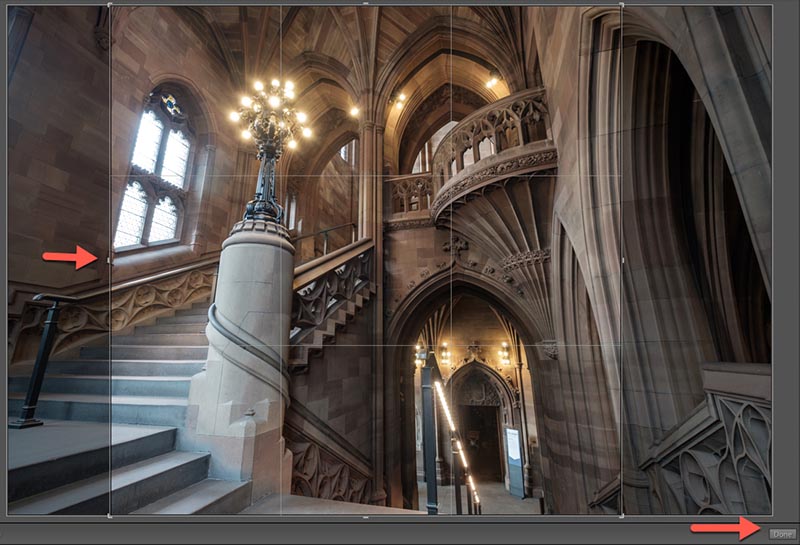
Here, the image is 3:2, with a 1:1 crop being taken with the edge of the crop on the left indicated by the arrow. Having resized and positioned the crop, click the Done button at bottom right of the preview to complete it.
Fixing the Horizon
Another common problem with photos, especially landscapes, is that the horizon can be slanted and distracting.

The Crop Overlay panel also includes a Straighten Tool to correct tilted images.
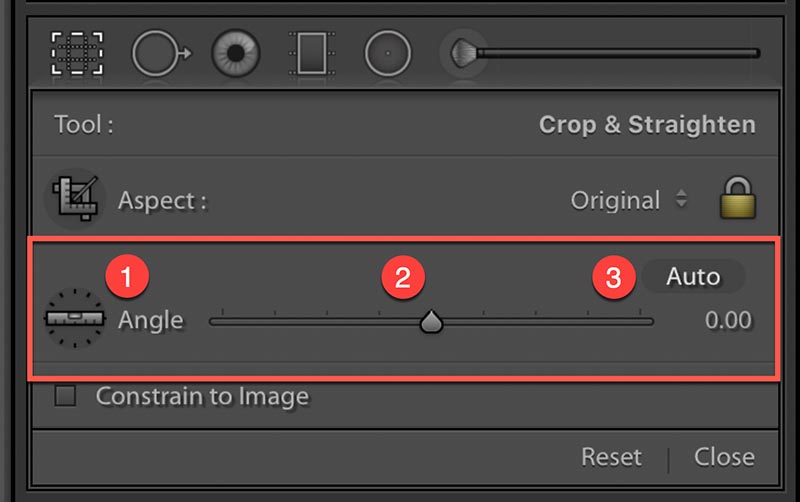
Click the spirit level tool (1), and then click and drag out a line along the horizon in your photo. Lightroom checks the angle of the line and rotates the image to level the line.
Alternatively, move the slider (2) left and right to rotate the image.
The Auto button (3) causes Lightroom to automatically level the photo, but it’s only really reliable when there’s a well-defined horizon.
Leaning Buildings
Sometimes, when using a wide-angle lens to photograph a building, it makes the building appear to tilt backward.

We can use the tools in the Transform panel (on the right side of the interface) to correct this.
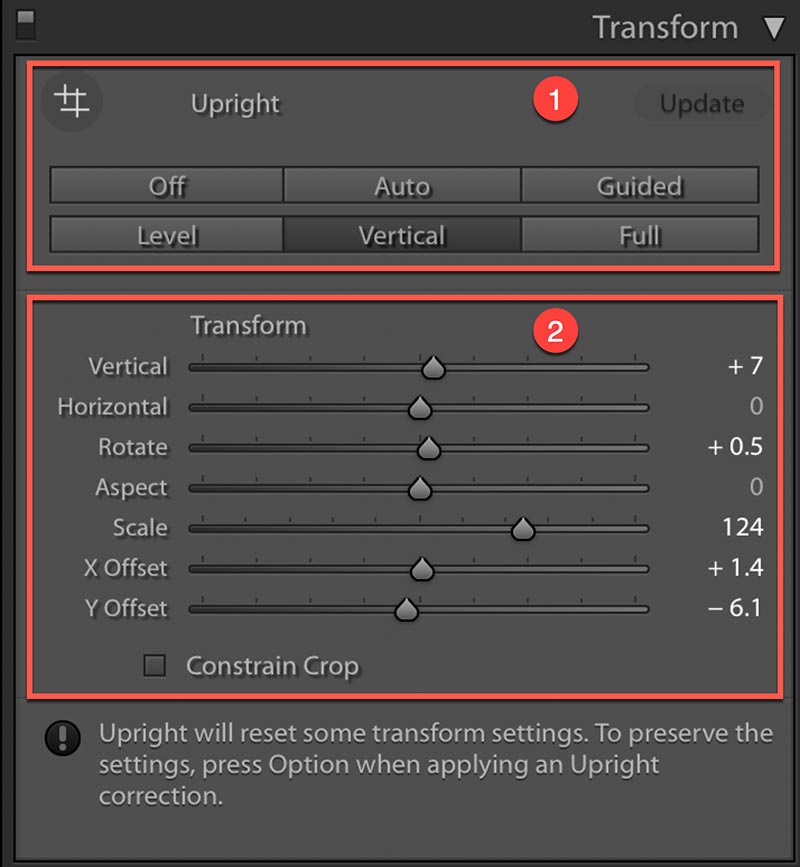
The tools in the top section (1) are automated, while those in the bottom section (2) offer more control. The two sections work independently and can be used together to improve results.
In the example image, the edges of the building need to be upright rather than leaning in. We can fix this with the “Vertical” button. Section 2 sliders are used to refine the correction.
Use Scale to increase the size of the building in the frame. Use the X and Y Offset sliders to position the building in the frame.
Here, you can see the corrected photo using the settings above.

When you know you need to use these controls, shoot your photo with plenty of surrounding space to allow for the changes.
We’ve now examined a range of tools to fix common problems. Tomorrow, we’ll look at the Brush Tool, which is used to select and adjust areas of a photo.
Recommended book
Share with friends