
Matching Labels and Filters
Episode #4 of the course Master your Gmail to get more done by Dan Silvestre
Welcome back!
In today’s lesson, we’re going to cover how to match your labels and filters.
This is an important step to automate having non-important emails go directly into a label, keeping your main inbox clean for truly important email.
How to Match Filters with Labels
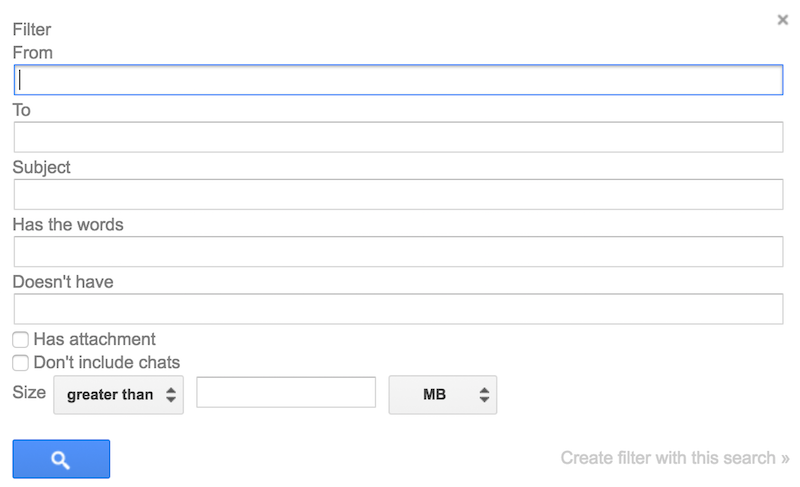
To create filters, navigate to Settings > Filters and Blocked Addresses. Scroll all the way down and click “Create a new filter.” It should show you this:
Basically, what Gmail will do is use a search to filter specific types of emails. To move an email to a label without hitting your GTD Gmail, you have to tick “Skip the Inbox (Archive it)” and “Apply the label,” and choose the right one from the dropdown:
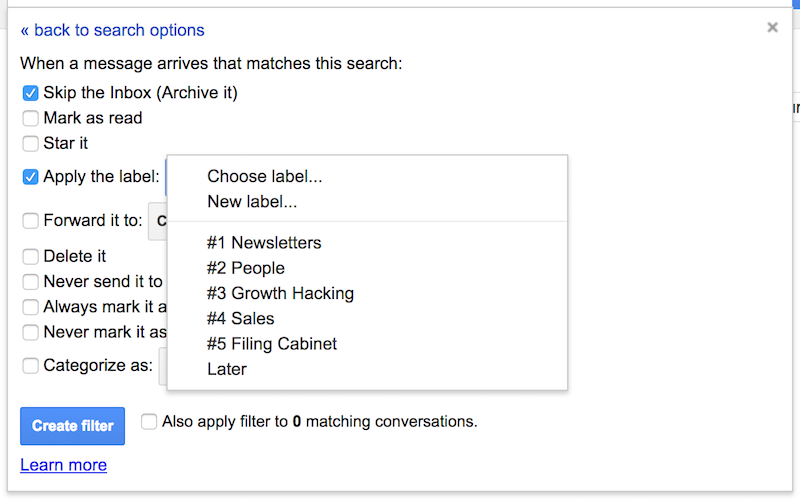
You might also want to “Mark as Read” for emails you don’t need to read, like receipts or ticket confirmations. This will keep the email in the label but won’t show an unread email. Since you don’t need to read them anyway, this is exactly what you want.
Repeat this process for all the labels and filters you need to set up.
Advanced Trick for Matching
Most of the time, you can use one specific label for many different emails. For example, all marketing newsletters you subscribe to. Ideally, you want this type of email to be filtered automatically, so you don’t have to manually add a filter every time you subscribe to a newsletter.
How can we do this the GTD way?
First, here’s what not to do:

Many people use search operators—in this case, OR—in filters, having a very long query to match a label. Why is this terrible?
1. Every time you want to add an email, you have to do it manually.
2. It slows down your email client.
Since this is not the most efficient method, it’s not the GTD Gmail way. Here’s a little-known Gmail “secret” I like to call, “email siblings”: You can add a plus sign and any word before the @ sign, and messages will still reach your primary email.
Using dan+hello@gmail.com is exactly the same thing as dan@gmail.com.
But if this hack doesn’t change anything, why should you use it? Because it’ll make setting and maintaining filters a breeze. Like this:
![]()
One filter to rule them all.
Whenever I sign up for an email newsletter, I make sure to add “+growth” after my email ID. Then this filter takes care of the rest, skipping the GTD Gmail Inbox and putting the email directly in a label.
I never have to update the filter, I just have to remember to add that part (I have it on autocomplete).
Here are three ideas for how you can use this neat trick:
• Filter Friendly Email: Add “+friends” when sending an email to a friend, and it will go to a label once they reply. Or instead, give them VIP status by setting your filter to mark these messages as important and top priority.
• Divide Work and Personal: If you use your account for both personal and work email, you can add “+work” to your Gmail address for any work-related conversations.
• Create To-Do Lists: Add “+todo,” and you can email yourself tasks, which comes in handy if you are on your phone and don’t have the GTD Gmail. Then, it’s a matter of choosing the option to star that email in the filters.
You have now set up the main framework of the GTD Gmail. In the next lesson, we will cover advanced features that you can add on top of the main framework.
To a Productive You!
Dan
Recommended book
Manage Your Day-to-Day: Build Your Routine, Find Your Focus, and Sharpen Your Creative Mind by 99U
Share with friends