Lightroom Features to Help You Edit Photos
Episode #4 of the course How to edit photos in Lightroom by Robin Whalley
It’s easy to make mistakes when editing, and you might find you want to go back a few steps. Lightroom has some great features if you find yourself in this situation.
Undo and Redo
Lightroom keeps a record of the changes you make when editing. This is called the “History” and can help you undo mistakes.
To undo a change, select “Edit | Undo” from the Lightroom menu.
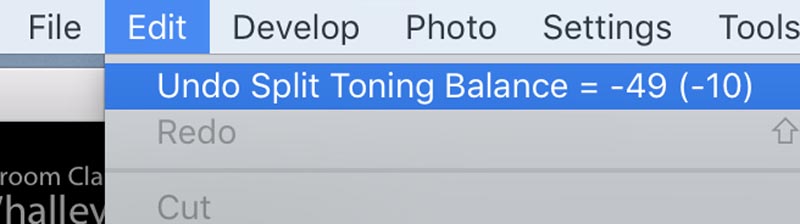
The menu shows the adjustment that you’re about to undo—for example: “Split Toning Balance = -49 (-10).” Select Undo, and the menu shows the next adjustment in the sequence.
You are undoing each of the changes you made, in chronological order.
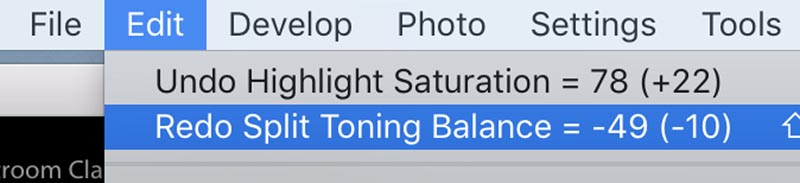
Notice that having used the Undo feature, you can use the Redo command in the Edit menu.
Think of the history as a long list of changes you apply to an image, with the most recent at the top. Using Undo and Redo works up and down this list.
History Panel
Undo and Redo are useful to undo a couple of steps, but sometimes you need to go further back in the history list. This is where the History panel (on the left of the interface) can help.
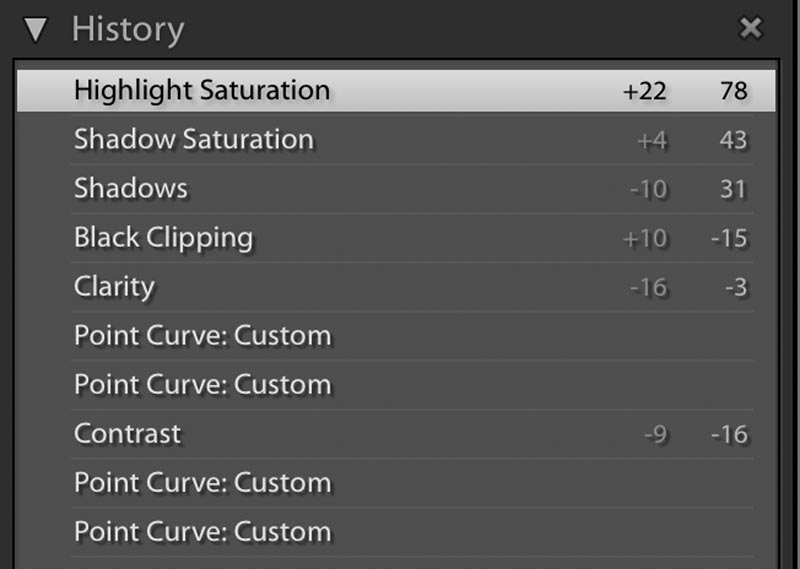
This shows the sequential list of changes applied to the current image.
Click an item in the list, and the image changes to reflect that point in the editing. You can click on any item in the list until you find the point you want. Then when you make an adjustment to the image, it will be applied from your selected point in the history. This causes any history after that point to be removed.
If you reset your editing point in error, use the “Undo” feature to remove your latest adjustment and return the History.
Snapshots
While the history list records all the changes that are applied to an image over time, the Snapshot captures their current position. For example, you might apply a Contrast adjustment of +10, followed by an Exposure increase of +10, followed by returning the Contrast to 0. The history list records each of these changes in order. If we now create a Snapshot, we record the Exposure = +10 and Contrast = 0.
The Snapshot panel lists the snapshots taken for the image that’s currently being edited.
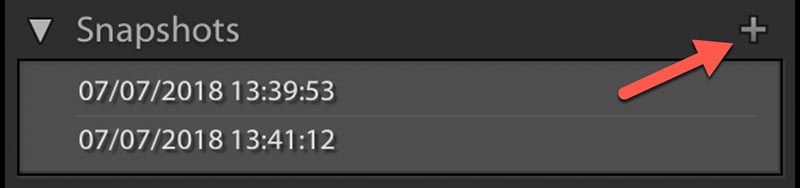
You can create a new Snapshot by clicking the + icon at the top right of the Snapshots panel.
By default, new Snapshots are added with a name taken from the data and time. You can change these names either in the dialog when they are created or by right clicking a Snapshot in the panel and selecting the Rename option from the popup menu.
When you click on a Snapshot in the Snapshots panel, any adjustments you have made are changed to match the settings recorded for the selected Snapshot. If you clicked a Snapshot in error, you can use the Undo feature to correct this.
It’s also possible to update a Snapshot with the current adjustment settings for the image. To do this, right click the Snapshot to be updated, and select “Update with Current Settings” from the menu.
Snapshots, like the History list, are stored separately for each image. As you change between images, you’ll see both panels update. Snapshots and History are preserved between editing sessions. This means you can close Lightroom and return to work on an image another day, and previous Snapshots and History are still available.
You should now feel confident in applying adjustments and correcting errors. Tomorrow, we will look at the process of cleaning up images.
Recommended video
Productivity Secrets in the Lightroom Develop Module
Share with friends