Learning about Image Quality
Episode #6 of the course Introduction to photography by Robin Whalley
Yesterday, you learned the rules of composition. In this lesson, we’ll cover image quality and you’ll learn how to avoid common mistakes.
Understanding Image Quality
Image quality is important because problems can distract the viewer or prevent them enjoying the photograph. Sometimes, you may not realize there’s a problem, but the more experienced you become, the more obvious problems are.
We can group or classify common problems as either technical or compositional. Technical problems relate to your equipment and how you use it. Sometimes, you can identify and avoid these problems, but sometimes you can’t. Compositional problems are mistakes you make while composing your photograph and can be avoided with care.
Common Technical Problems
Here are common technical issues and how to avoid them.
• Blurred image
This image appears blurred or soft.
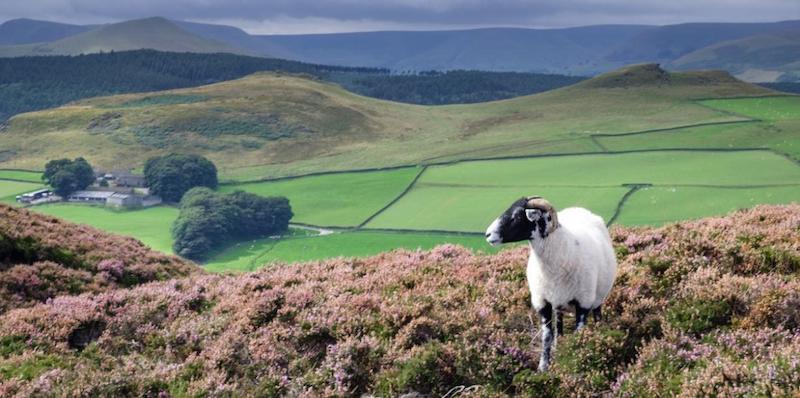
You can see the problem when you zoom in to look at the detail.
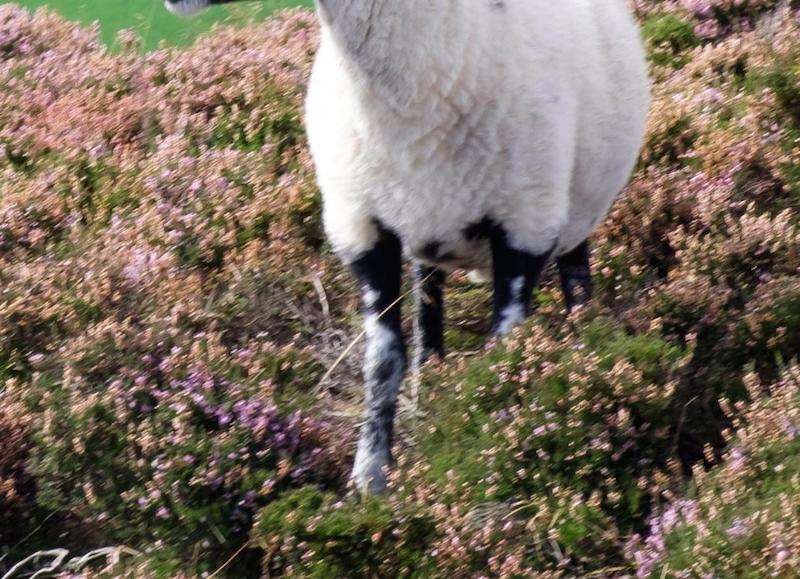
The image is blurred because the camera wasn’t steady when taking the photo. The problem was caused by a slow shutter speed.
Always try to use a shutter speed faster than the focal length of the lens. When using a 90mm lens (full frame terms), use a shutter speed faster than 1/90”. To increase the shutter speed, you could use a wider aperture or increase the ISO setting on the camera. Alternatively, use a camera support, such as a tripod or monopod, which we cover in a later lesson.
• Exposure problems
Poorly exposed images were covered in an earlier lesson, but there’s another problem you could encounter, usually when photographing landscapes.
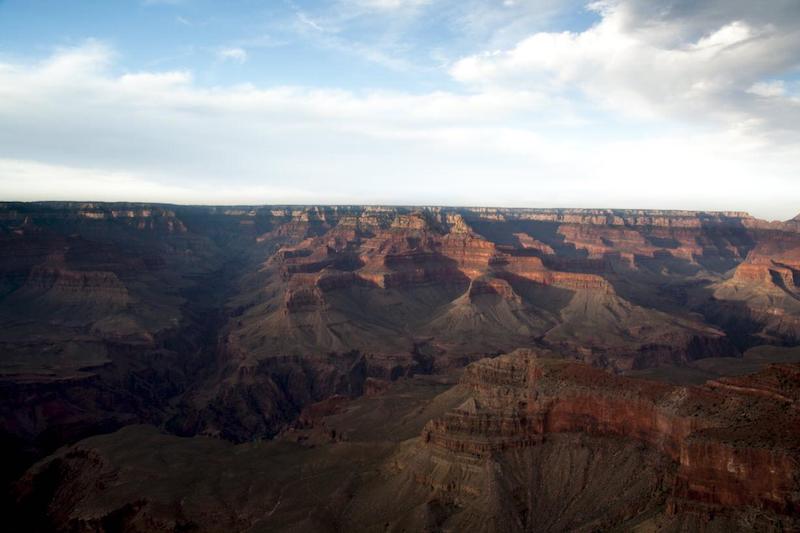
Here, the ground is in shadow and too dark, whilst the sky is too light. This happens when the level of light in the darkest and lightest areas of a scene exceed what your camera can handle. This is known as the dynamic range.
Cameras have a lower dynamic range than our eyes. We may see a nice scene, but the camera will capture dark shadows and/or a washed-out sky. What we expected to capture was this.

You can correct the problem by placing a filter over the sky to darken it. You may also be able to improve the photo with post-processing software.
• Image noise
Image noise can create an ugly pattern in a photo when magnified.

The grainy black and white pattern in this image is luminance noise, and the color speckles are color noise.
Noise is best avoided by using a low ISO setting. The lower the ISO you set, the less noise is visible. You may be able to reduce the noise using special noise reduction software.
Common Compositional Mistakes
Here are common compositional mistakes and fixes.
• Subject lost in the frame
Here, a wide-angle lens was used to include an interesting foreground, but the subject appears very small in the frame.
You can correct this by moving much nearer to the subject, so they occupy more of the frame. Alternatively, use a telephoto lens with a longer focal length to bring the subject nearer to the camera.
• Distracting objects around the subject
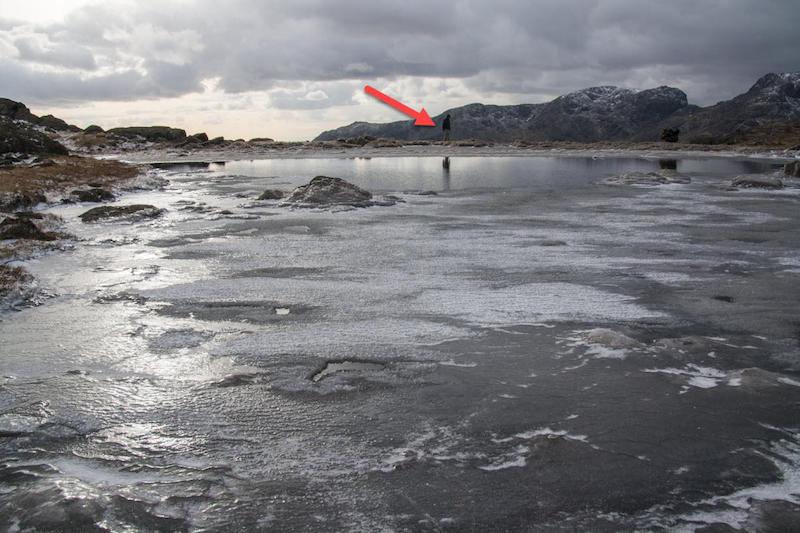
The subject of the photo should be obvious. Sometimes, objects around the edge of the frame can distract attention away from the subject.
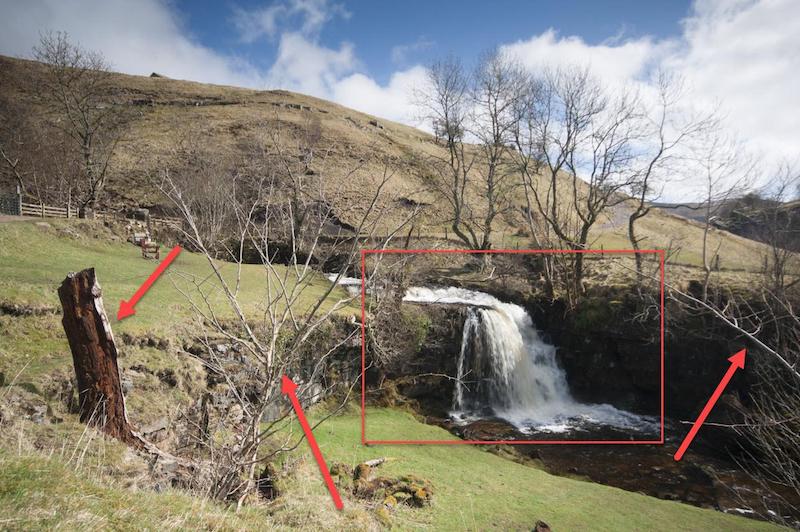
In this scene, the waterfall is too far from the camera and there are distracting objects in the frame, as shown by the red arrows. Always check around the edges of the frame for distractions before taking the photo.
• Tilted horizons
A tilted horizon will distract from the image.
pic6.8
Here, the horizon shown by the red line is tilted. This was caused by the tripod sinking into the sand when the tide came in. Some cameras have a horizontal level indicator. Check to see if your camera has this feature.
Tomorrow, you will learn about some of the photographic accessories that can help you create even better photography.
Recommended video
YouTube blind critique video in which the positives and negatives of images are discussed.
Share with friends