Introduction to the Editing Tools
Episode #2 of the course How to edit photos in Lightroom by Robin Whalley
In today’s lesson, we will look at some of the editing tools in the Develop Module. Be sure to experiment with these on a photo as you complete the lesson.
Categorizing the Adjustment Tools
There are many Lightroom tools to help you edit your photos. These are called Adjustment Tools and appear in the panels on the right of the screen. It’s important to remember that you don’t need to use them all to produce great results.
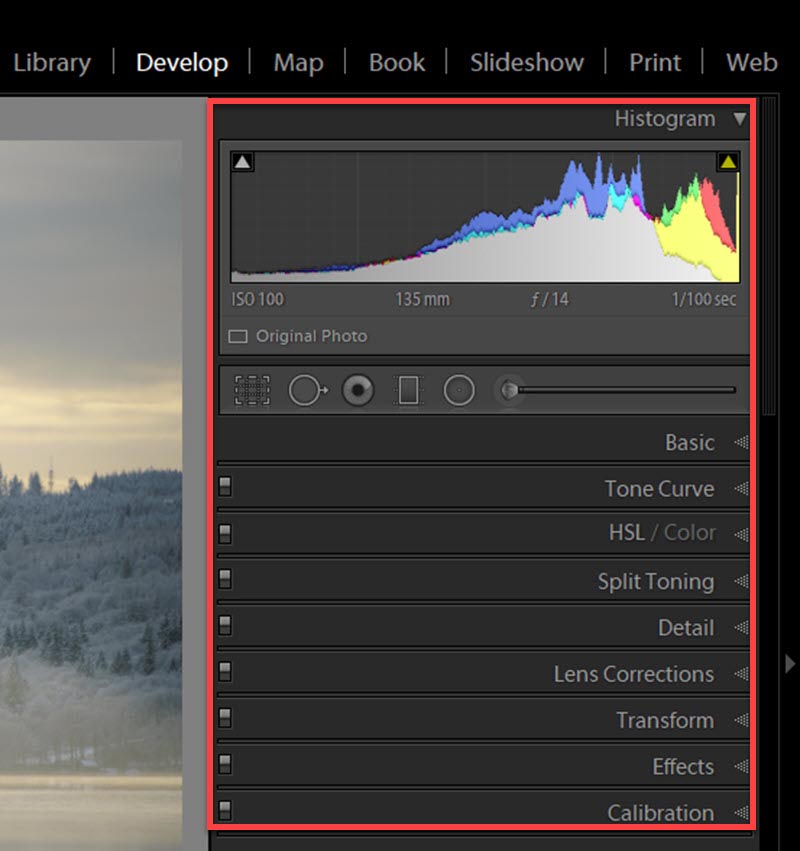
This course will concentrate on some of the most useful of these tools.
Histogram
The histogram is a graph showing how dark or light pixels are in the photo.
The left side represents dark pixels, and as we move to the right, the pixels become lighter. In this image, the grey in the histogram shows that most of the pixels in the image are light. The histogram also shows information about individual colors.
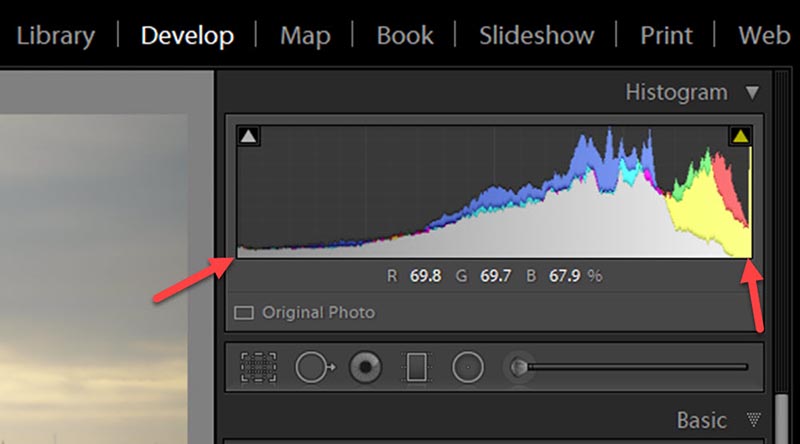
If the histogram is cut off at one or both ends, this is called clipping. If the left side of the histogram is clipping, it shows some areas of the photo have turned black. Clipping on the right side shows areas of the image that have turned white.
Clipping usually means detail is being lost from the photo, which can look ugly. The adjustments in the Basic panel help you fix problems with clipping.
Basic Panel
The adjustments in the Basic panel are a good place to start when editing your photos. Keep watching the Histogram as you make your changes.
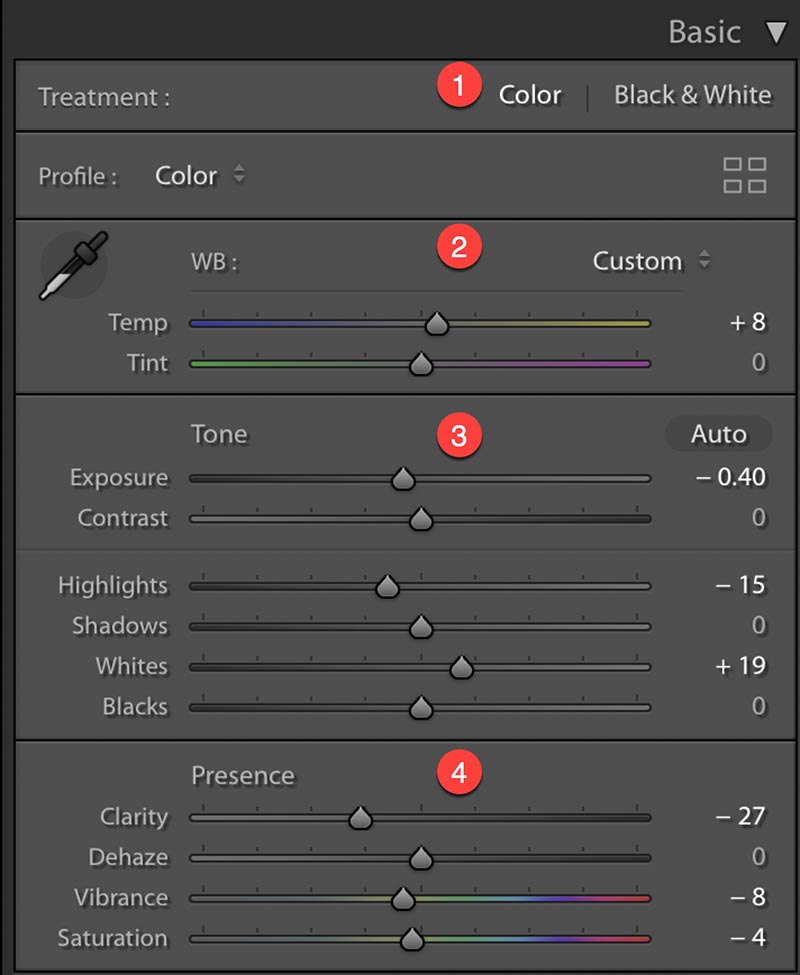
Here are the main tools:
1. You can change a color photo into black and white.
2. The white balance controls are used to make white objects appear white. You can also use these controls creatively. Move the Temp (temperature) slider right and the image appears yellow (warm). Move it to the left and the image appears blue (cool).
3. Tonal controls to adjust dark and light areas of the image. If you see clipping in the histogram, you can use the sliders to fix this. The Exposure, Highlights, Shadows, Whites, and Blacks sliders control different areas of the histogram. Position your mouse over a slider, and the area of the histogram it relates to is highlighted. The Contrast slider reduces or increases contrast in the image. Increasing contrast makes dark tones darker and light tones lighter.
4. The Clarity and Dehaze sliders are special types of contrast adjustment but can also create special effects. For example, move the Clarity slider to the left to produce a ghostly glow. The Vibrance and Saturation sliders can increase or reduce the intensity of color. Vibrance tends to produce more natural results.
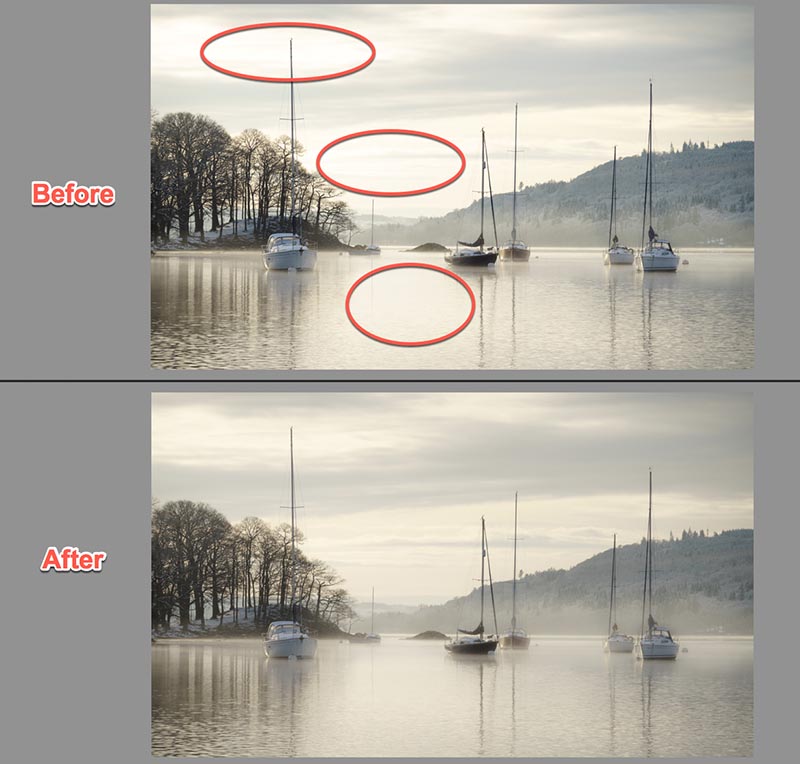
Here, you can see an example where the brightest areas of the image were too light (circled areas). This was corrected using the Whites, Highlights, and Exposure sliders in the Basic panel, as shown in the previous illustration.
HSL/Color Tools
HSL stands for Hue, Saturation, and Lightness, which you can control for individual colors.
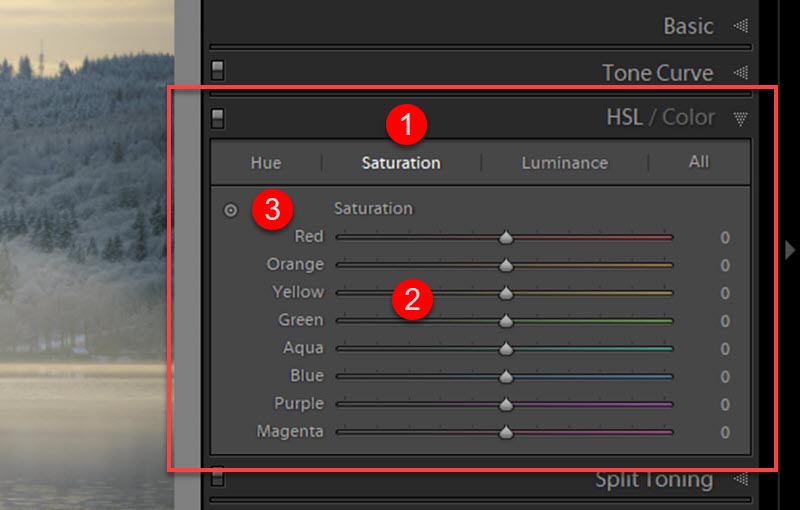
Three sets of controls are numbered:
1. Select the Hue, Saturation, or Lightness of a color.
2. Pick a color, and move the slider left to reduce the effect or right to increase it. In the above, moving the Orange slider to the right will make orange in the image stronger or more saturated.
3. Click the Selection Pin to activate it. Now click a point in your image and hold down the mouse button. Drag up or down to adjust the color sliders based on the point you clicked. Click the Selection Pin icon a second time to deactivate it.
Now that you understand some of the adjustment controls, tomorrow’s lesson will explain how to add special effects to your photos.
Recommended reading
Further information about the Lightroom Develop Module.
Share with friends