Introducing the Lightroom Develop Module
Episode #1 of the course How to edit photos in Lightroom by Robin Whalley
Welcome to this course, which will explain how to edit and add special effects to photos using Adobe Lightroom. In today’s lesson, you will learn about the different versions of Lightroom and familiarize yourself with the Lightroom Develop Module.
Understanding Lightroom Versions
Adobe launched the first version of Lightroom (1.0) in February 2007. This was followed by other versions through to Lightroom V6, which launched in 2015. The 2015 release of Lightroom also saw the introduction of Lightroom CC (or Creative Cloud). Lightroom CC was important because it marked the change from purchasing Lightroom to renting it for a monthly payment.
Lightroom CC now includes several different versions, which can seem confusing at first:
• Lightroom Classic CC is the most commonly used.
• Lightroom CC integrates with the Adobe cloud.
• Lightroom CC Web is entirely online and accessed using a browser. It also connects to images in the Adobe cloud.
• Lightroom CC Mobile is used on mobile devices like phones and tablets.
This course covers Lightroom Classic CC, but the tools and principles you’ll learn can be applied to other versions.
When you see the term, “Lightroom,” in this course, it refers to Lightroom Classic CC.
Introducing the Lightroom Modules
Lightroom is organized into a series of modules visible along the top right of the interface.
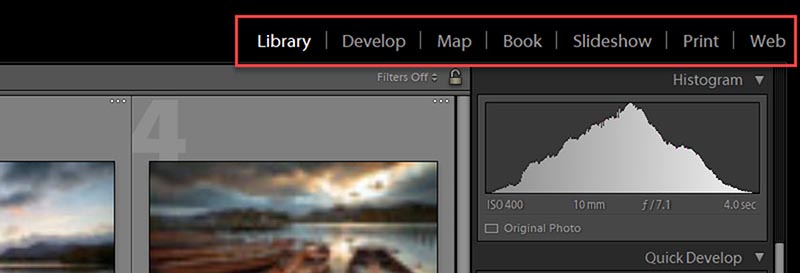
You can select a module by clicking these links, and each module has a specific purpose. These are:
• Library: organizing and finding images
• Develop: editing images
• Map: organizing images by location
• Book: creating photo books
• Slideshow: producing photography slideshows
• Print: preparing and making photographic prints
• Web: producing a web gallery of photos
Introducing the Develop Module
The Develop Module is where we will be editing images.
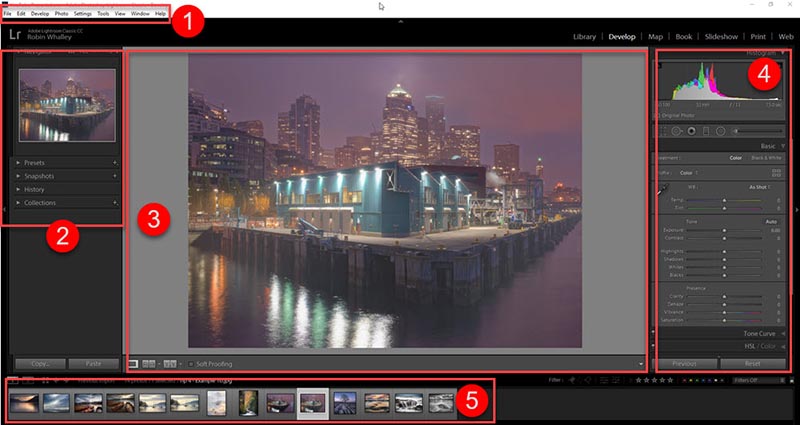
The Develop Module interface has five broad areas:
1. The menu. Most menu commands can be performed using the tools in the other areas.
2. The helper panels. These don’t make changes to images but help you with the editing process.
3. The preview area. This shows a preview of the adjustments applied to an image.
4. The adjustment panels. These are used to edit photographs.
5. Film strip showing thumbnails. You can change the photo you’re working on by clicking another thumbnail.
Introducing Presets
In the helper panels on the left side of the screen, you will find one titled, “Presets.”
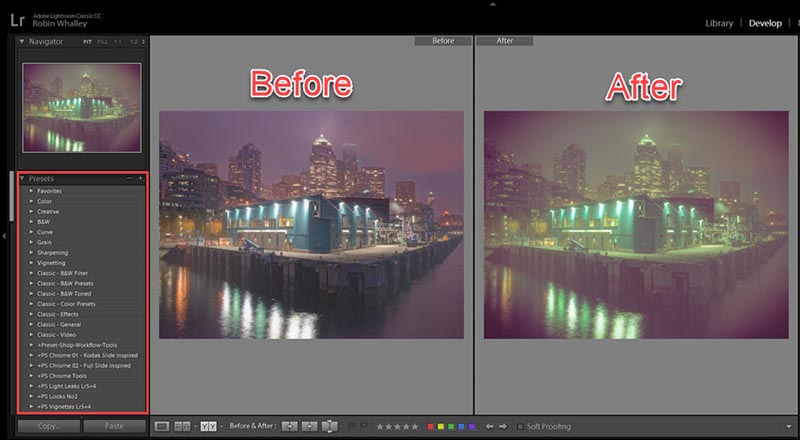
Presets are a way to save complicated adjustments to reuse them on other photos. Click a preset in the Preset panel on the left to apply the adjustments to an image.
Lightroom includes several Presets that you can try out. If you don’t like one, click the “Reset” button to the bottom right of the screen, below the editing tools. Later in this course, you will learn about other ways you can undo changes.
As well as Presets included with Lightroom, you can find collections of both free and paid Presets on the internet. But before deciding to spend money on any, be sure to complete this course.
Now that you are familiar with Lightroom’s Develop module, we’ll look at the editing tools more closely tomorrow.
Recommended reading
For a general overview of some of the Lightroom Modules:
• Introduction to Lightroom Part One
• Introduction to Lightroom Part Two
For Preset related resources:
• A Selection of Free Lightroom Presets
• How to Install Lightroom Presets
Share with friends