Improving Your Selections
Episode #9 of the course How to edit photos in Lightroom by Robin Whalley
In previous lessons, you learned how to create selections. In today’s lesson, you will learn how to refine your selections with precision.
Adobe has gradually been improving Lightroom’s selection tools over several versions. Depending on your version of Lightroom, you may not have access to all the features covered in this lesson.
Brushes in Filters
You may have noticed that the Graduated and Radial Filters have a “Brush” link in the top right of the panel.
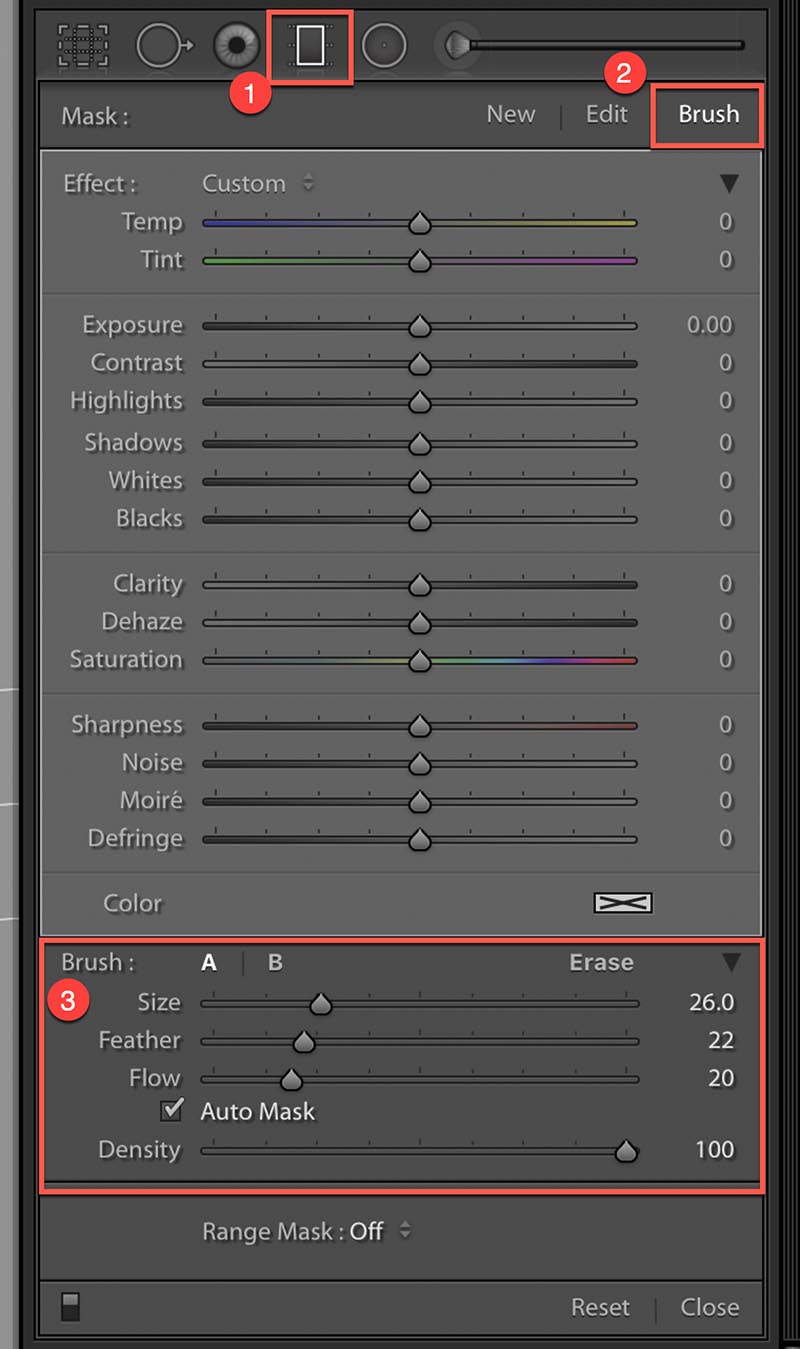
If you open and add a new Graduated Filter (1), the Brush link (2) becomes available.
When you click the Brush link, the Brush panel opens (3) at the bottom of the panel.
These tools work in the same way as the Brush tool we covered earlier. You can use them to add/remove an area of the selection you made with the Graduated Filter.
Example
In this example, the Graduated filter is used to quickly select the sky in a photo, but the selection covers areas other than the sky.
To fix this, we can use the Erase Brush in the Graduated Filter to remove the unwanted selection.
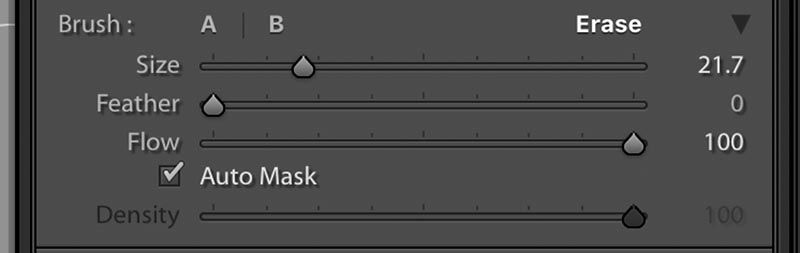
The Erase Brush is selected, the Feather set to 0, and the Flow to 100. We can now erase the unwanted areas using the Auto Mask option.

Once finished, we can adjust the sky without affecting the tree or the hillside.
Range Selection
Adobe recently released a Range Mask feature within each of the selection tools. Once you’ve selected an area, you can control what’s selected based on color or tones. The previous example could have been achieved quicker using this feature.
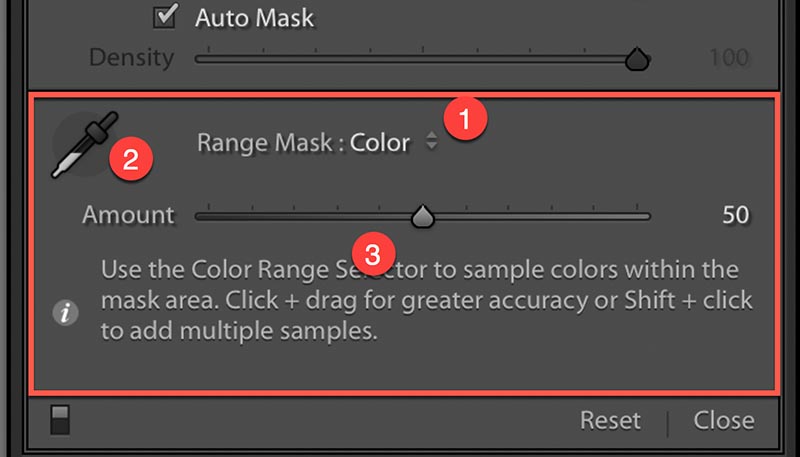
The Range Mask is “Off” by default. To use it, select “Color” or “Luminance” from the drop-down list (1).
Selecting the Color option, you can click the eyedropper tool (2,) and click an area of the image to sample the colors there. Your selected area is then refined to only include the sampled color.
You can further refine the selection with the Amount slider (3). Move the slider to the left if you require a close color match or to the right to allow a wider range.
Luminance Range
When you use the Luminance option, you can control how light or dark an area is for it to be selected.
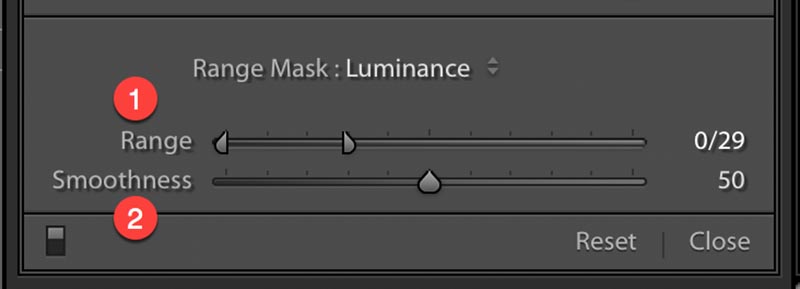
The Range control (1) has two sliders. The left slider controls the dark tones and the right slider the light tones. To the right of the range, you see 0/29, which relate to the left and right sliders. A value of 0 represents black and a value of 100 represents white.
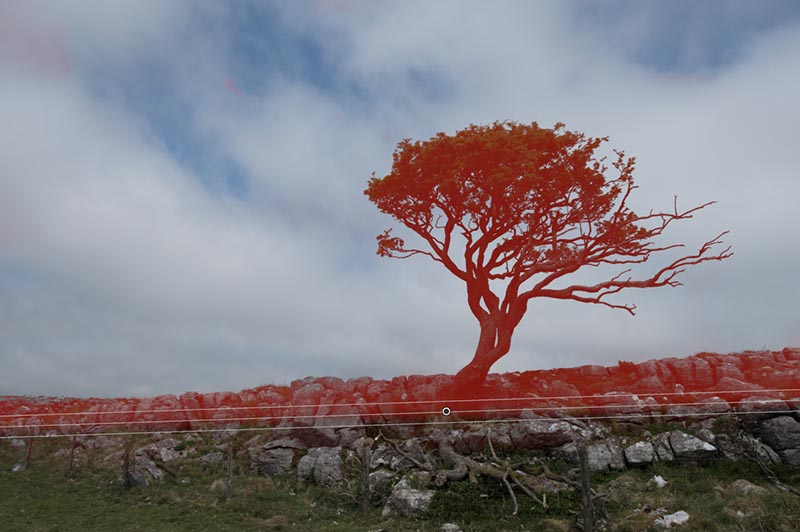
Move the sliders left and right; the tonal range between them is what’s selected. You can use the option to display the red overlay mask to make it easier to see what’s selected.
The Smoothness slider (2) controls the blending of the selection. When the slider is far left, the selection has a hard edge, while over to the right, the selection is softened.
In the screenshot below, a large section of the sky has been selected using the Graduated Filter. This has been refined with the Luminance Range Mask settings above, to prevent the lighter tones in the sky from being selected.
Now you understand how to control and adjust selections, it’s time to learn how to export your finished images. That’s the subject of tomorrow’s lesson.
Recommended videos
Because creating and refining selections is such an important editing skill in Lightroom, I created a series of videos on YouTube to help people wanting to know more:
• Introduction to the Luminosity Range Mask
• Advanced Masking with the Lightroom Selection Brush and Range Mask
• Creating a Complex Selection Mask in Lightroom
• Make Amazing Selections with the Lightroom Brush Tool
Share with friends