Adding Special Effects
Episode #3 of the course How to edit photos in Lightroom by Robin Whalley
Last lesson, we looked at some of the editing tools you can use to enhance photographs. This time, we’ll look at how to transform them with special effects.
Black and White Conversion
Converting a photo to black and white is a popular effect and easy to do in Lightroom. There’s an option to do this in the “Basic” panel.
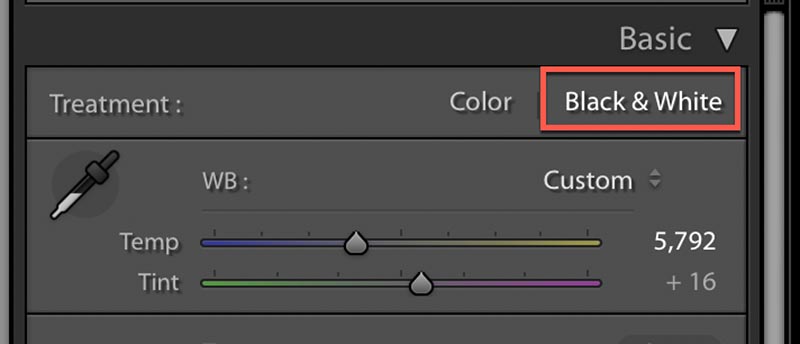
When you click the “Black & White” treatment, the image is converted (you can return to the color version by clicking the “Color” link).

We also looked at the HSL/Color panel further down the adjustments yesterday. When you convert your image to black and white, this changes to display “B&W” controls.
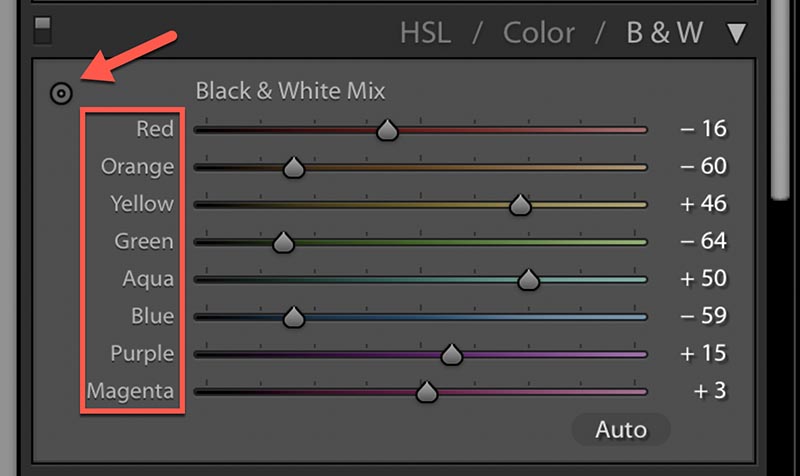
When you use the color sliders, you’re controlling how light or dark that color appears in the image. For example, to lighten an area of the image that’s yellow, move the Yellow slider to the right. To darken blue areas, move the Blue slider to the left.
If you’re not sure which sliders to use, click the Selection Pin in the top left of the panel. You can then click and drag on a point in the image to adjust the tones. Drag up to lighten an area and down to darken it.
There’s also an Auto option (bottom right), but it’s better to control the changes yourself.
Below you can see the effect of the above B&W slider adjustments.

Adding a Vignette
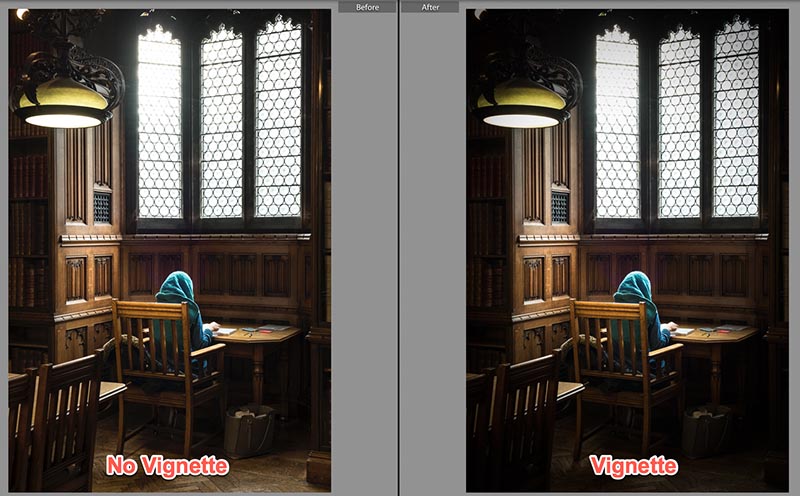
One of the oldest and still-popular effects is to add a vignette to a photo. A vignette will darken or lighten the edges of the image but leave the central area of the image unchanged. This helps to draw and hold your attention on the main part of the photo.
The vignette adjustment is found in the “Effects” panel.
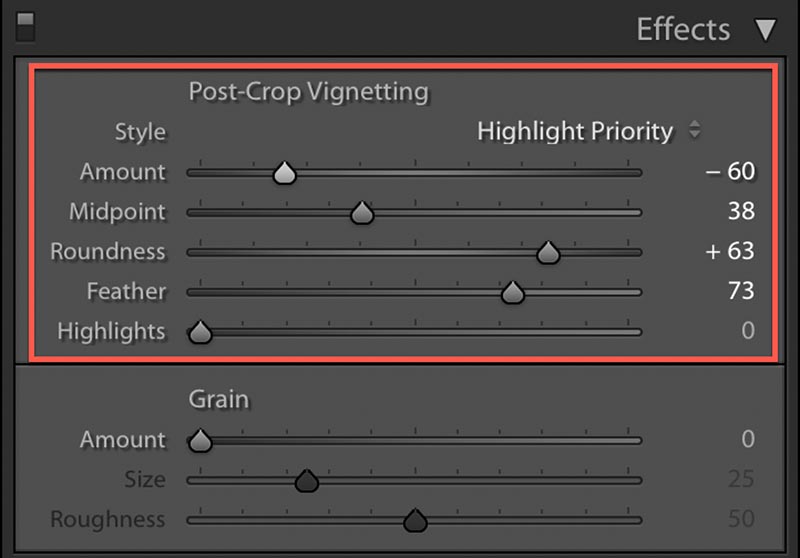
Move the Amount slider to the left for a dark vignette and to the right for a light one.
Next, move the Midpoint slider left and right to control the size of the vignette.
The Feather slider controls how soft or hard the edge of the vignette is. Move it to the left to produce a hard edge and right for a soft edge. It helps to initially set a hard edge, as it’s easier to see. You can increase the Feather to soften it later.
Use Roundness to change the shape of the vignette from rectangular to circular.
You can see the effect of the above adjustments on the photo below.
Adding Grain to Simulate Film
Adding grain to an image is another popular effect. Many people feel today’s digital cameras produce images that are too clean and adding grain improves them.
The grain adjustment is found in the Effects panel.
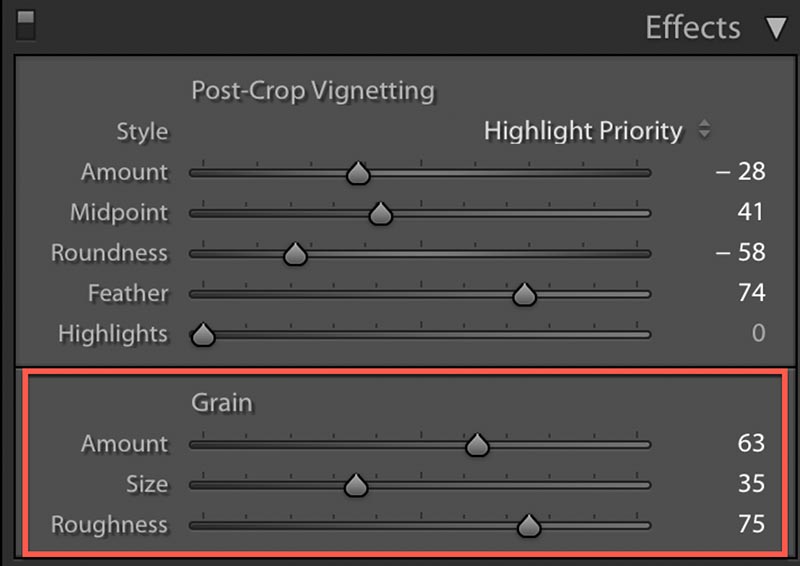
Move the Amount slider to the right to control how much grain is added.
The Size slider controls how visible the grain is. It becomes easier to see as its size increases.
Set the grain size too small and the grain appears false. Set a high value for Amount and Size, and the image appears like film.
The roughness slider controls how uniformed (low values) or random (high values) the grain pattern appears.
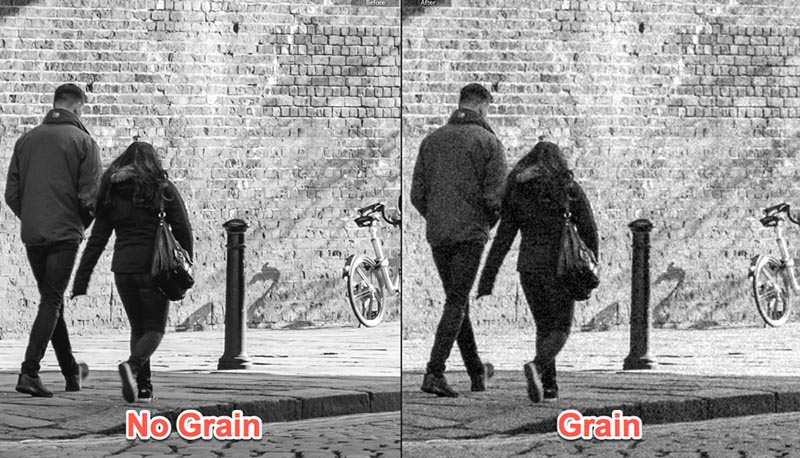
You can see the effect of the above adjustments in the following photos.
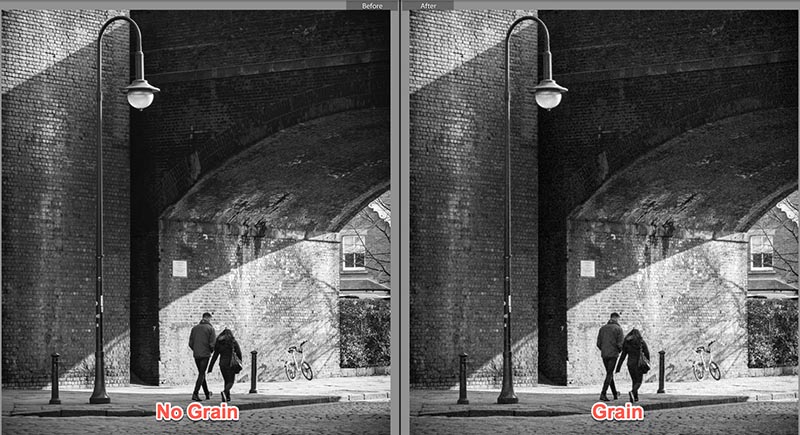
It’s only when you magnify the image that you can notice the effect.
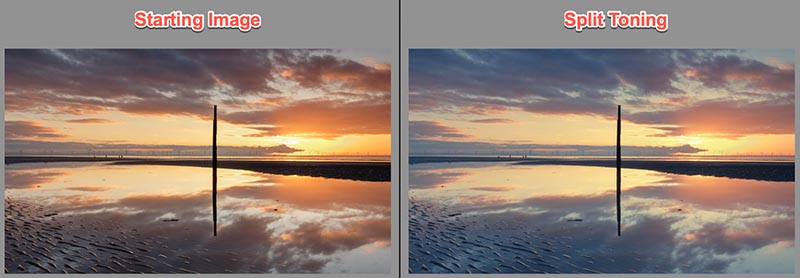
Split Toning
The cinematic industry loves special effects using a technique called “Color Grading,” where a color is overlaid on an image. You can do the same using the Split Toning panel.
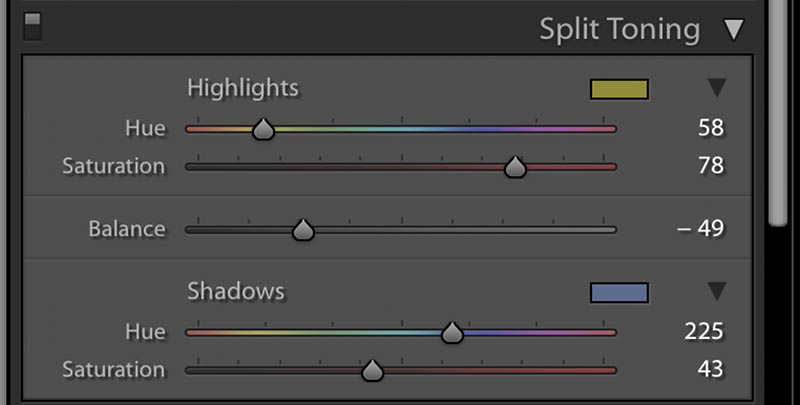
Use the Hue sliders to select a color to be added to the Highlights and Shadows in the image. Then use the Saturation sliders to adjust the intensity of the effect. Finally, use the Balance slider to adjust the balance between the two colors.
Using this technique and reducing the Contrast level can add a retro feel to your images. You can see the effect of the above adjustments in the photo below.
Tomorrow, we’ll look at features to help you edit images.
Recommended reading
Lightroom Color Grading for a Dramatic Sunset
Share with friends