Creating a hi-fi prototype with Sketch and InVision
Episode #6 of the course Design workflow with Sketch by InVision
We’ve got a handful of beautifully designed screens, and it’s time to share. Almost as quick as you can draft an email, InVision lets you build a working prototype. With a little finesse—and no code—we can build a prototype that will convince even the pickiest of clients.
Before we get started, you’ll need an InVision account. Here’s a link for 3 months free for new users. Let’s roll!
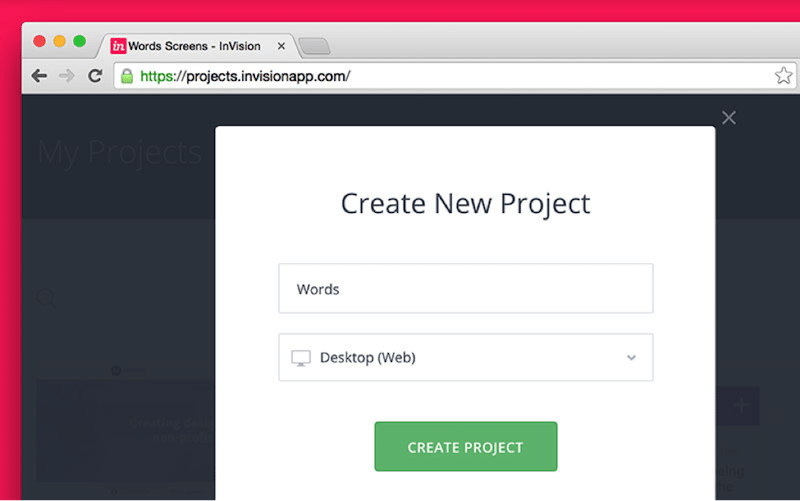
Starting a new InVision project
Head to your Projects and look for the big pink button.
Projects are defined by device. Punch in a name, and let’s get started with a desktop project.
Use Selective Sync
With a new project created, you’ll need to add some screens. Set up automatic syncing with one of the supported cloud services. I use InVision’s Selective Sync.
Building a prototype
Our basic prototype is going to consist of 3 states: the blog index, a single blog post, and a photo modal overlay that’s launched when someone clicks a photo inside the blog post.
Exporting screens and assets
First up, we’re going to need to export our 2 main artboards: desktop-blog-index and desktop-single-post. They’re located in the Templates page of my .sketch document.
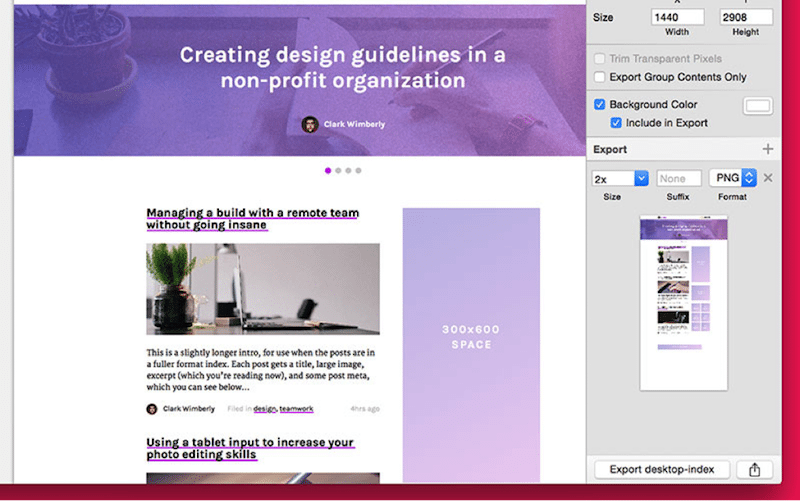
To export an artboard, first select the artboard then click the + icon in the Export tab inside The Inspector. Since I’m working on a retina machine, I’m going to export a 2x file to keep things sharp.
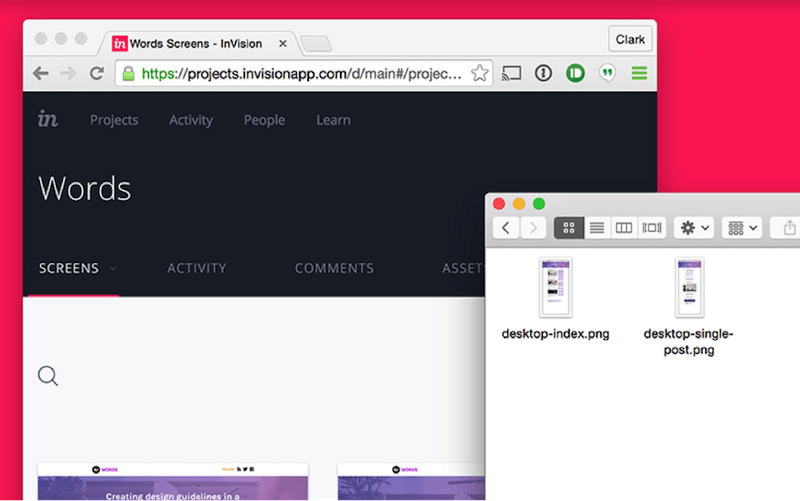
Save the files to the project folder inside your InVision Sync folder (or Dropbox, or Box). As soon as you save the files into your local folder (lower right), they’ll be uploaded and reflected inside your InVision project online (left).
Preview Mode
Click View Screen inside your project and you’ll be launched into Preview Mode, which lets you view and interact with your prototype. This is the main view your team will see when you share an InVision link.
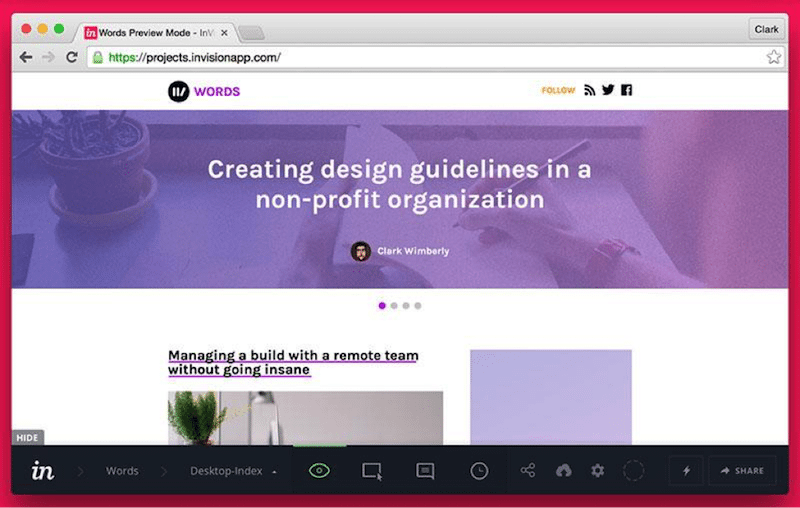
The big green eyeball means you’re in Preview Mode.
To actually make the prototype work like a real website, we’ll need to add some hotspots, which we can do in…
Build Mode
Build Mode is where we tell our prototype how to behave. Before we kick off with some hotspots, let’s set our fixed header.
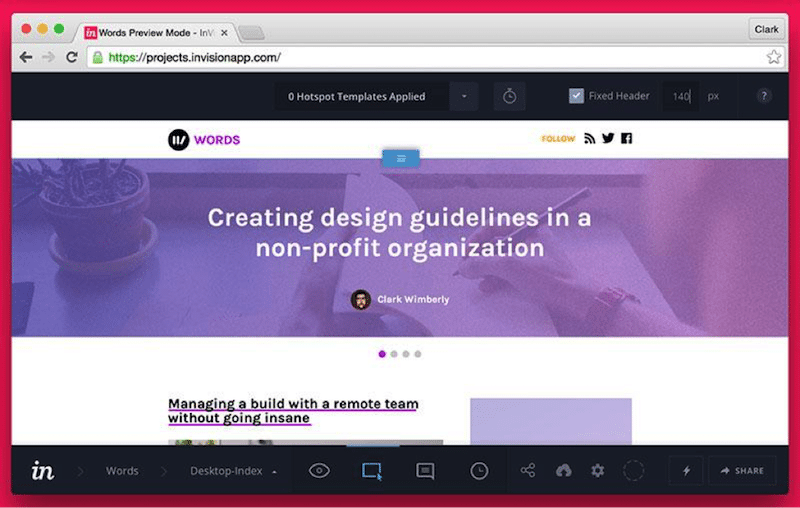
Adding a fixed header will keep our site header attached in place, even as the user scrolls.
Build Mode is where we’ll set up hotspots, the building blocks of functionality inside our prototype. With Build Mode active on our desktop-blog-index screen, let’s make a new hotspot for the main featured post (the big purple area).
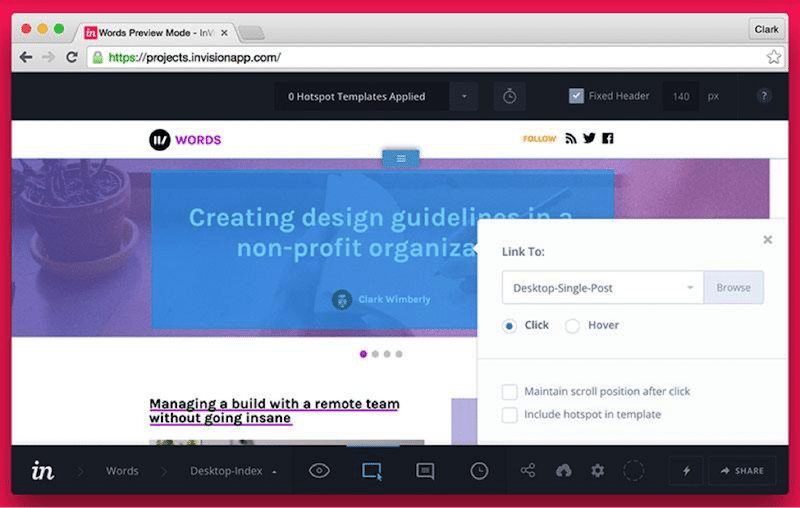
Click and drag to create a hotspot around the entire area. We want to Link To our single post screen, titled desktop-single-post. Save your hotspot and hop back to Preview Mode to test it. Now when a user views the index page, clicking the feature post will actually load the feature post view.
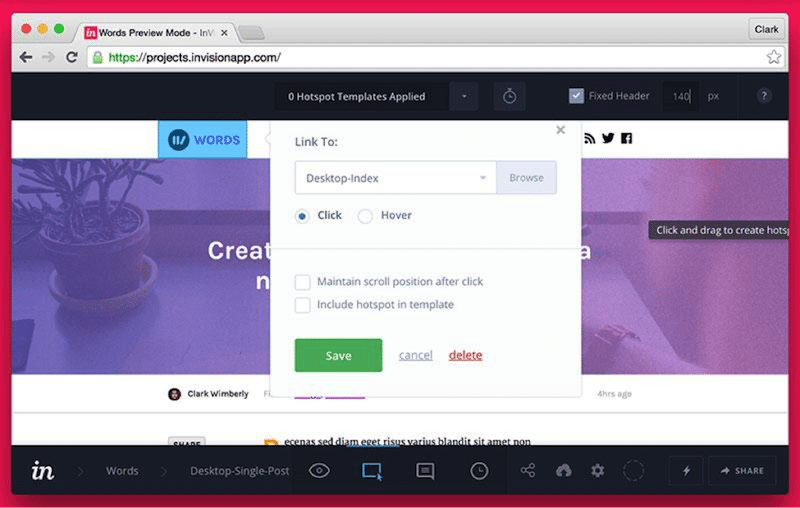
Once a user views a single post, we’ll need to provide a way back to the index view. Let’s add a hotspot to the main logo, linking to the desktop-blog-index screen. With this screen returning the favor, we’ve got a full loop where a user can view the homepage, click a post, view it, then return home.
Adding an overlay effect
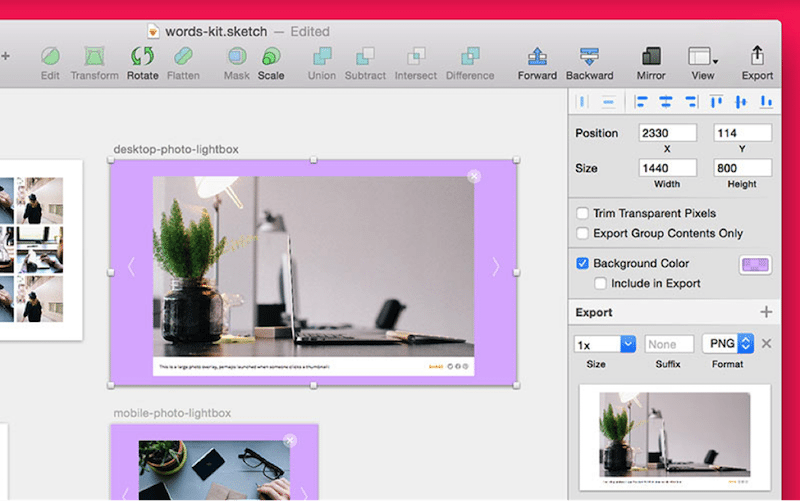
Start by exporting the artboard that has the overlay on it, desktop-photo-lightbox. In our .sketch file, I’ve included a light purple background effect on the artboard, but I don’t want it on my exported PNG file, so I’ll uncheck Include in Export in The Inspector.

Fire up Build Mode on the single post view, and scroll down to the inline image. Draw out a hotspot around it and Link To a Screen as Overlay. Select our new desktop-photo-lightbox and configure the options.
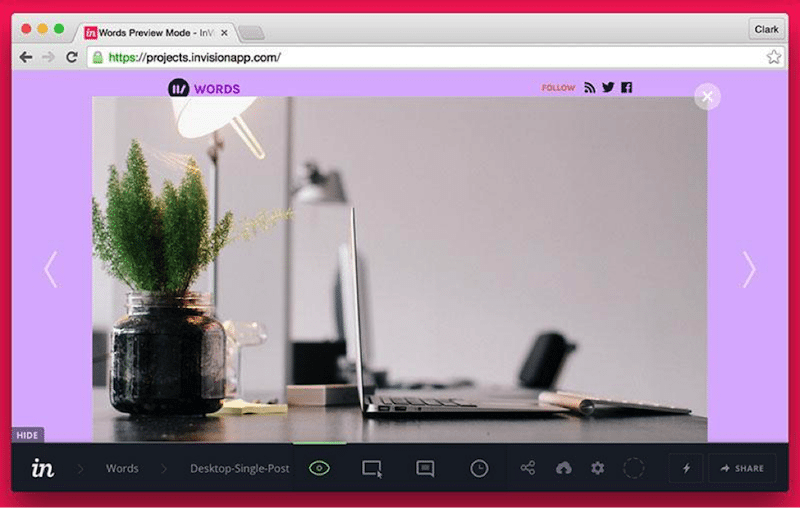
Hop back to Preview Mode to see the overlay effect in action. When you click the photo, a larger version should fade in, complete with a translucent background effect.
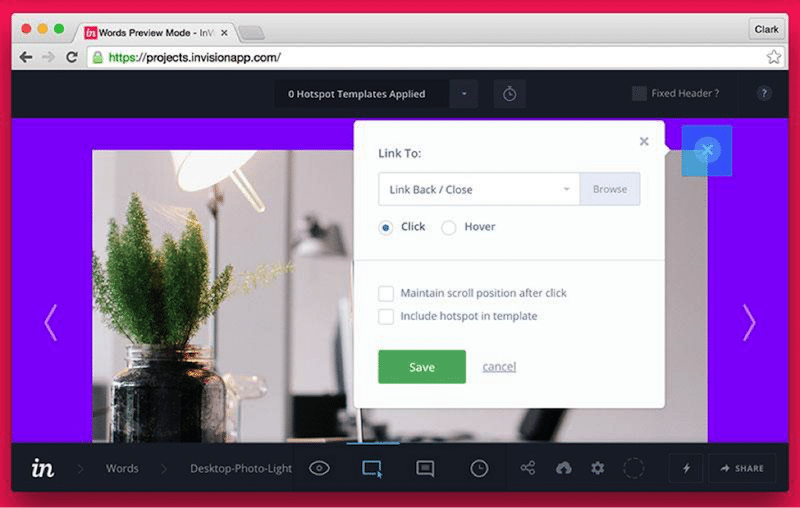
To complete the overlay effect, navigate to the desktop-photo-lightbox and enter Build Mode. Draw out a hotspot around the close button, and Link To: Close, which will get rid of the overlay.
Share with friends